
1. What is Partial COD?
Partial Cash on Delivery — sometimes called Upfront Payment, Deposit Payment, or Part Payment — is a hybrid checkout option for e-commerce stores. Rather than making buyers choose between paying everything upfront or paying everything on delivery, it splits the order into two pieces:- Upfront deposit (paid online): a small fixed fee (say, ₹99 or $5) or a percentage of the order (10%–20%), collected at checkout through UPI, cards, net banking, or a digital wallet.
- Remaining balance (paid on delivery): whatever’s left, collected by the delivery agent in cash or digitally when the package arrives.
2. Why Partial COD is Needed
In markets where cash on delivery dominates, 100% COD tends to quietly bleed money. A few reasons why:- Return-to-origin rates run high. Somewhere between 20% and 40% of fully-COD orders get rejected at the door—buyers change their mind, aren’t home, or were never really meant to keep the item. Each one means reverse logistics costs.
- There’s no real commitment from the buyer. When nothing’s paid upfront, ordering feels risk-free, which invites casual or even accidental orders.
- Shipping costs get eaten regardless. Forward shipping, return shipping, and the inventory sitting in transit all cost money whether or not the order is kept.
- Rejected packages tie up stock. They can spend days or weeks bouncing between transit and returns, which is inventory that could’ve gone to a paying customer.
3. Countries Where Partial Payment is Needed
Partial COD tends to matter most in cash-heavy e-commerce markets across Asia, MENA, and Eastern Europe:4. Setting Up Partial Payment
Here’s the full walkthrough for getting Partial COD live on your store. Steps 5 through 7 — rules, advanced settings, and UI — are really one continuous stretch of configuration, so don’t feel like you need to get everything perfect before moving to the next step. You can always come back and adjust.Step 1: Install and Activate the App
Head to the Shopify App Store, search for Codking, and hit Install. You’ll be asked to authorize a few permissions so the app can read your store catalog—go ahead and approve them.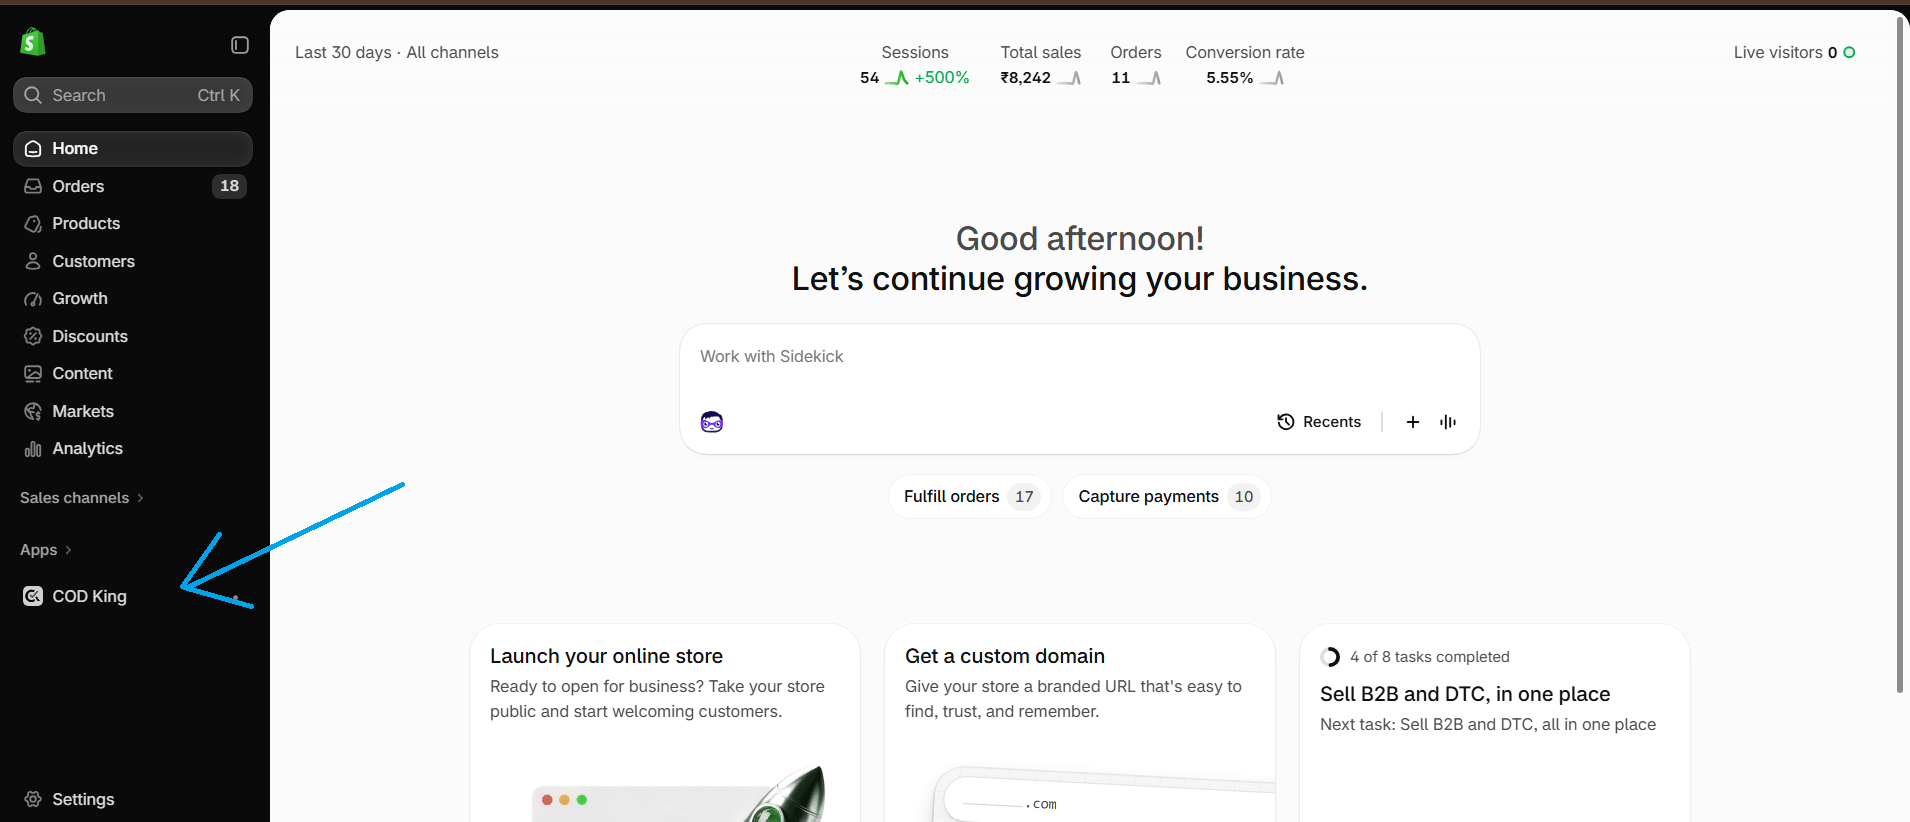
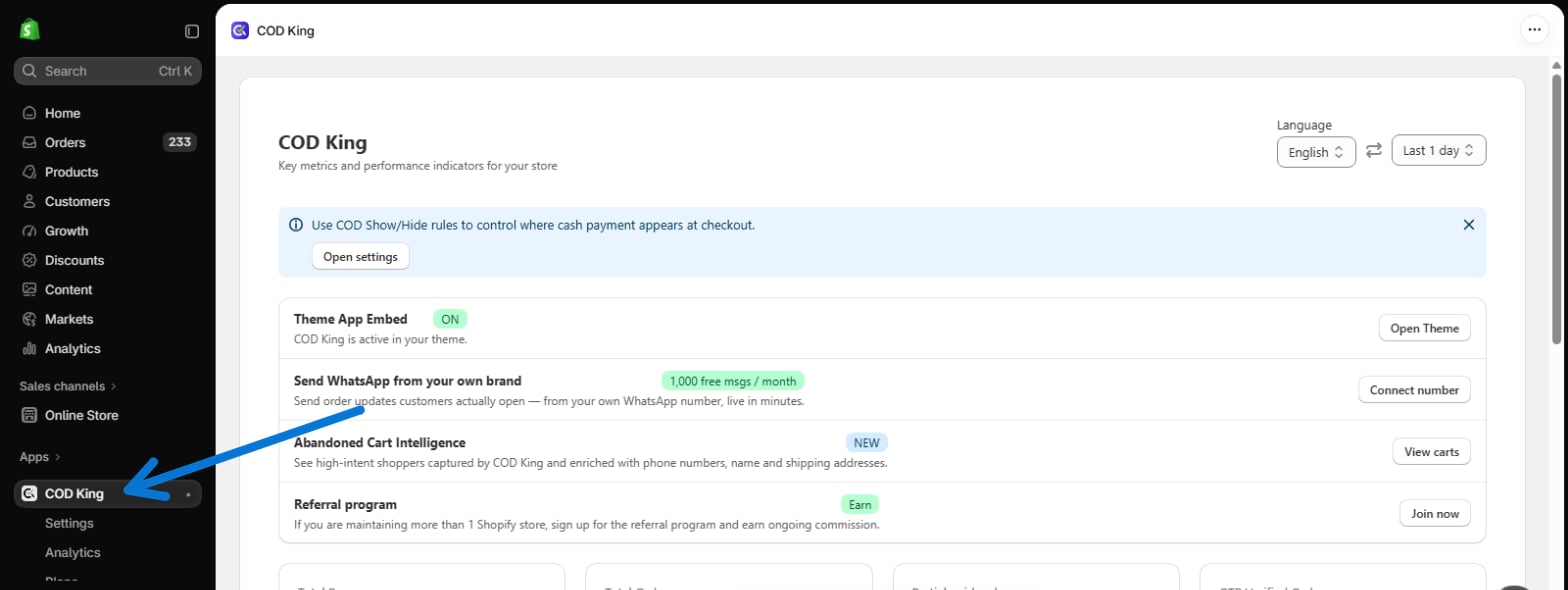
Step 3: Open the Partial Payment Feature
Under COD King in your left sidebar, click Settings, then choose Partial payments & COD.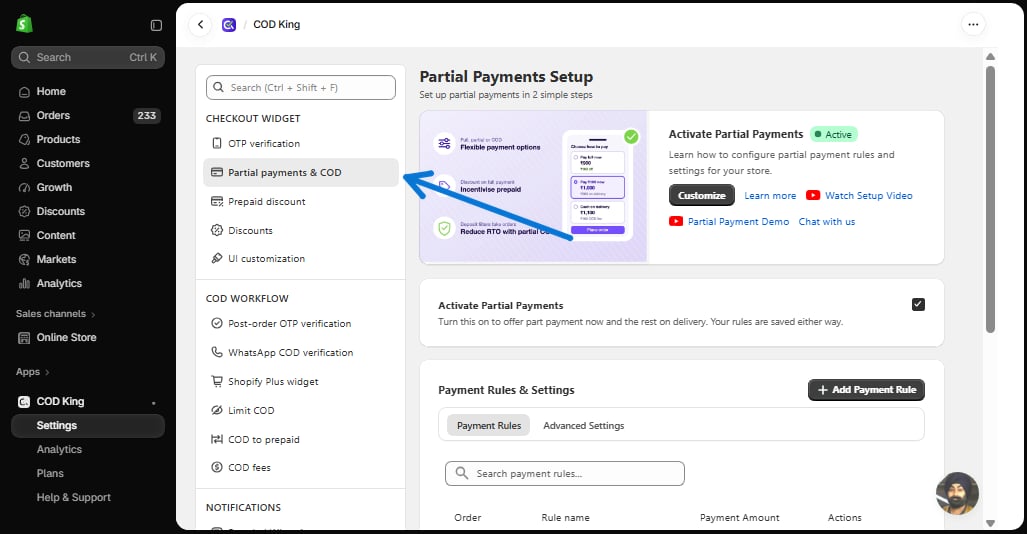
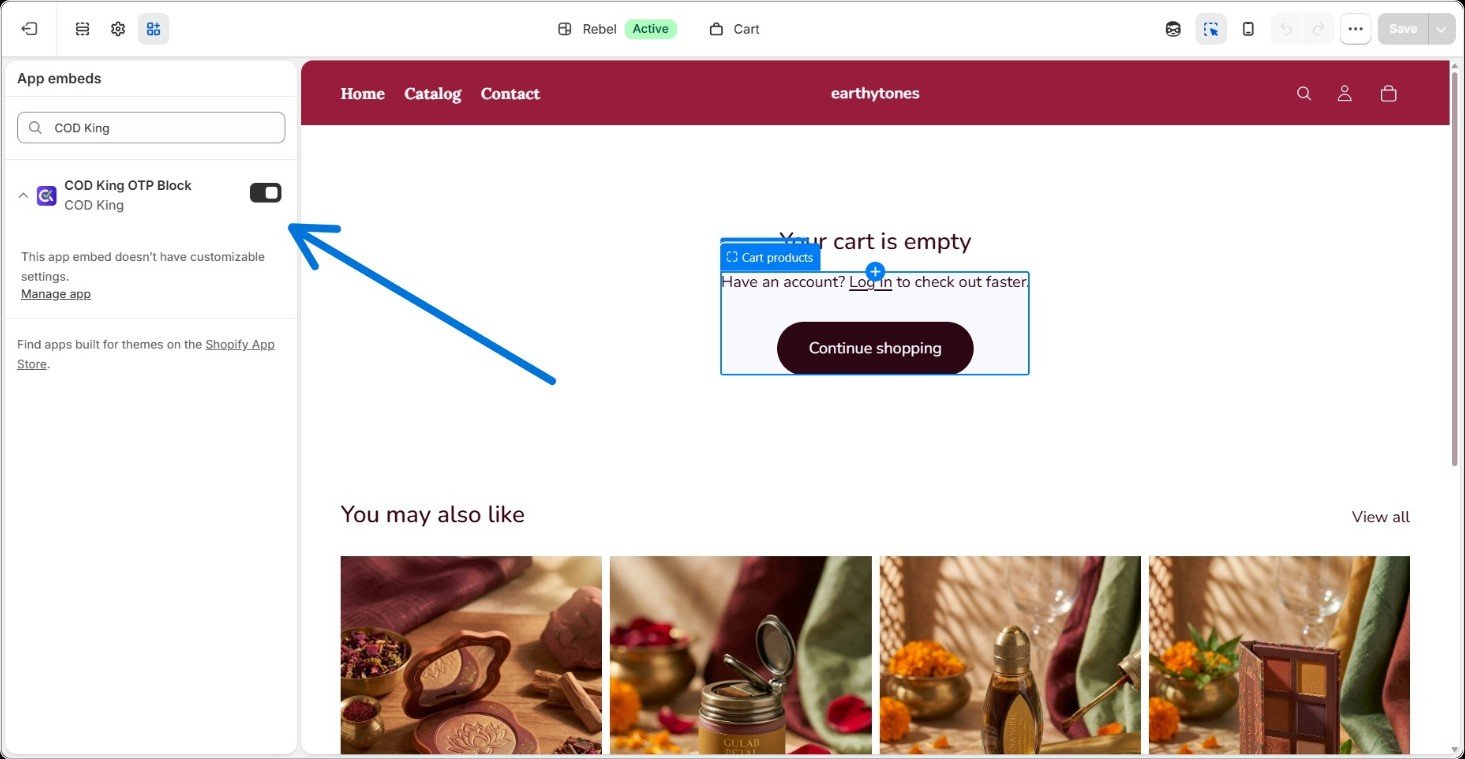
Step 4: Head Into the Theme Editor
You’ll find this option on the COD King dashboard—click COD King in the Apps section of your left sidebar.- In the Theme App Embed row, click Open Theme—this drops you into your Shopify store’s own editing interface.
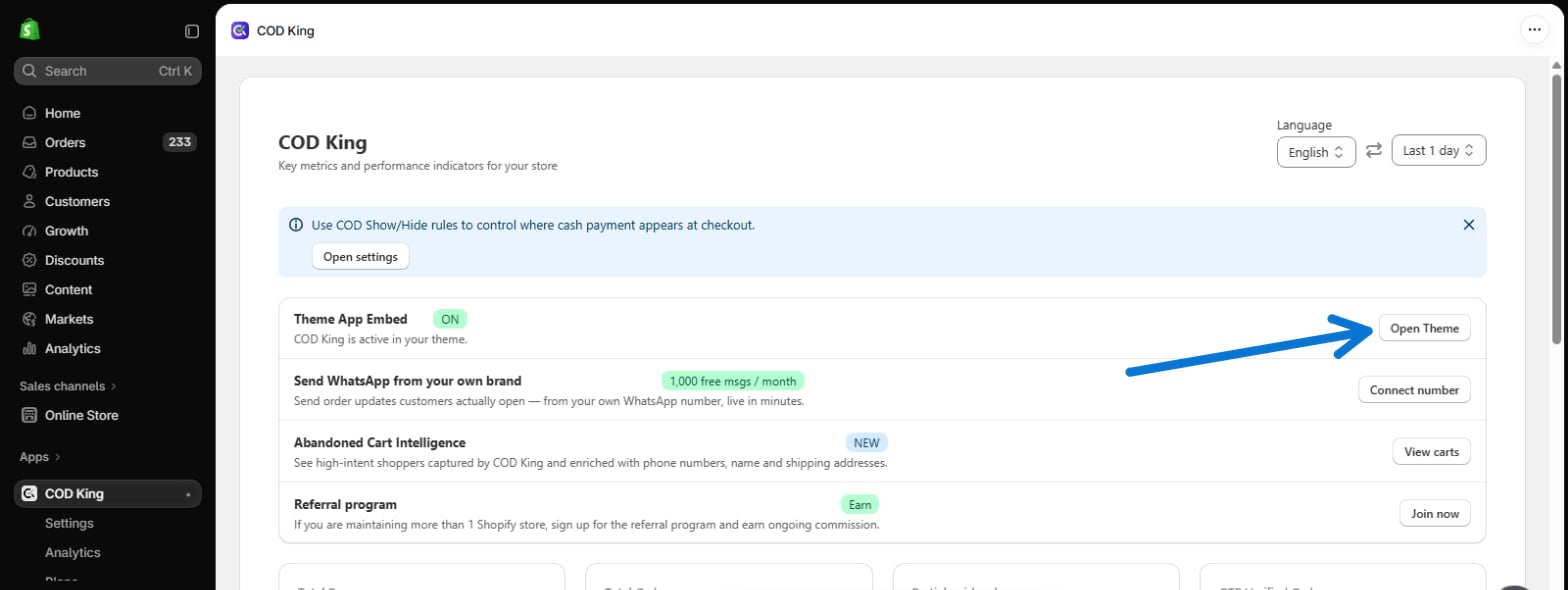
Once you’re in the theme editor, look for and select the COD Kings OTP block.
Step 5: Build Your Payment Rules
Back in the Shopify tab, open Settings → Partial payments & COD, scroll down to Payment Rules & Settings, and click Add Payment Rule. This is really the heart of the whole setup—it decides how much a customer pays upfront and under what conditions they even see that option. A rule is made up of a few parts: 5a. Rule Configuration Start by naming the rule—something like “Full Payment” or “10% Deposit” works fine. Then choose an amount type:- Full Payment—the customer pays the entire cost upfront.
- Percentage—a set percentage (say 20%) is paid now, the rest on delivery.
- Fixed—a flat amount (₹200, for instance) is collected upfront, regardless of cart size.
- Cash on Delivery (COD)—nothing is paid upfront; the full amount (plus optional delivery fees) is collected on arrival.
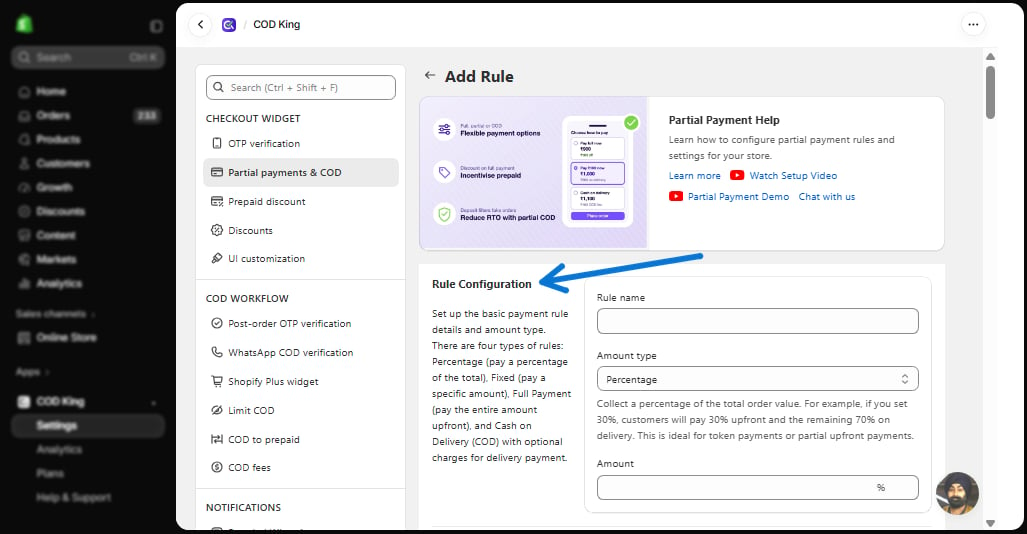
Which amount type makes sense depends on your market—a flat fixed deposit tends to work well in India, while a percentage deposit fits high-AOV markets like the UAE better.
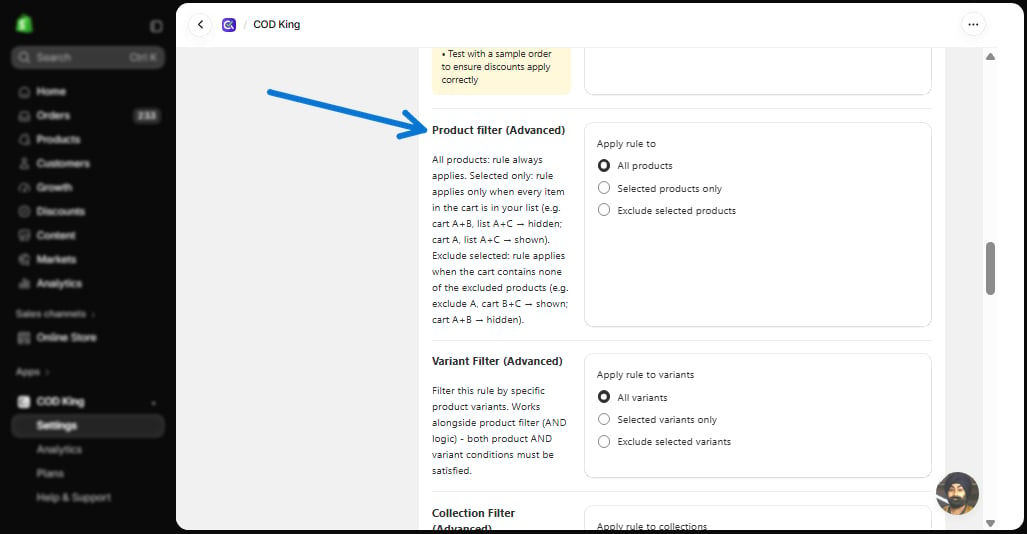
- All products—the rule shows up regardless of what’s in the cart.
- Selected products only—every item in the cart needs to be on your list. So if your list has Products A and C, a cart with A + B is hidden, while a cart with just A shows.
- Exclude selected products—the rule hides the moment any excluded product lands in the cart but shows for everything else.
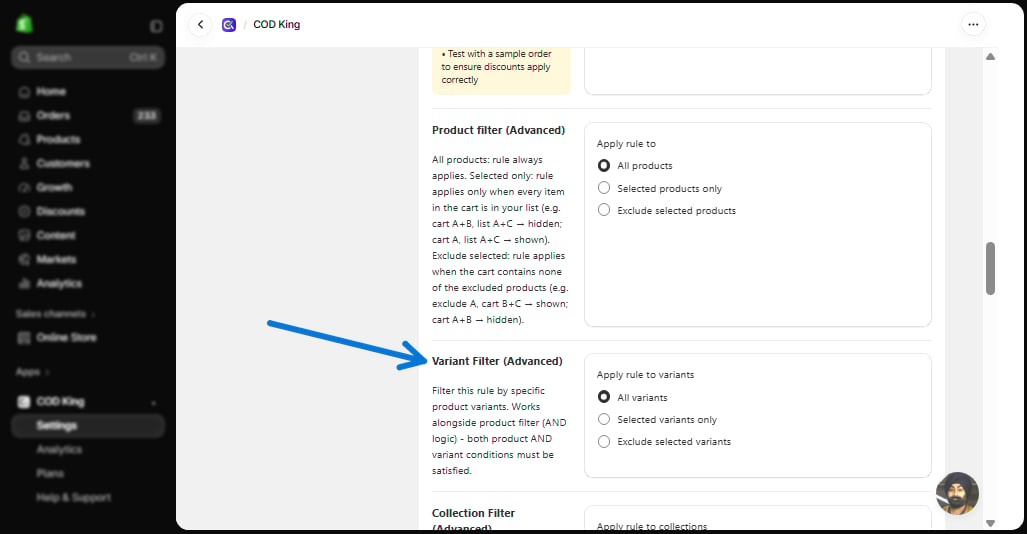
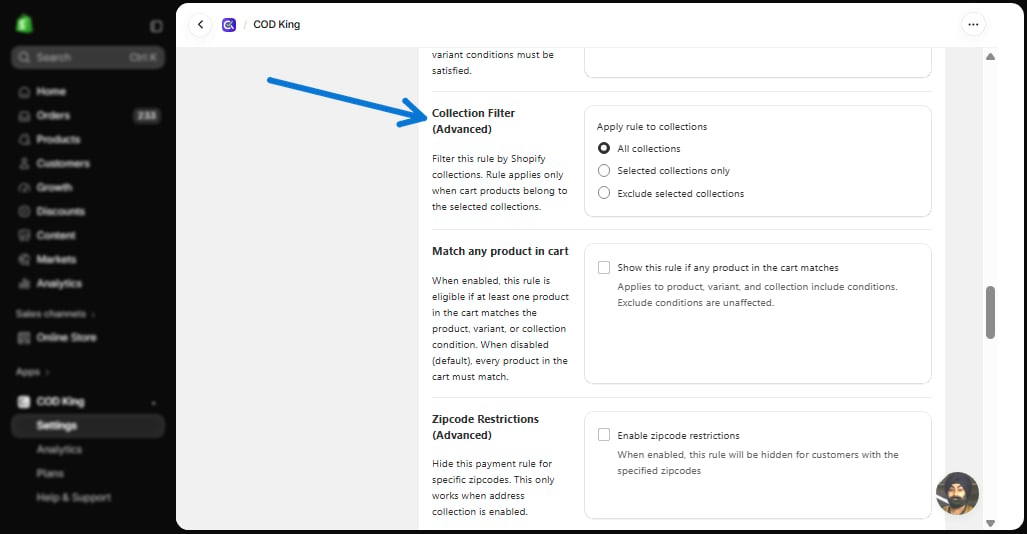
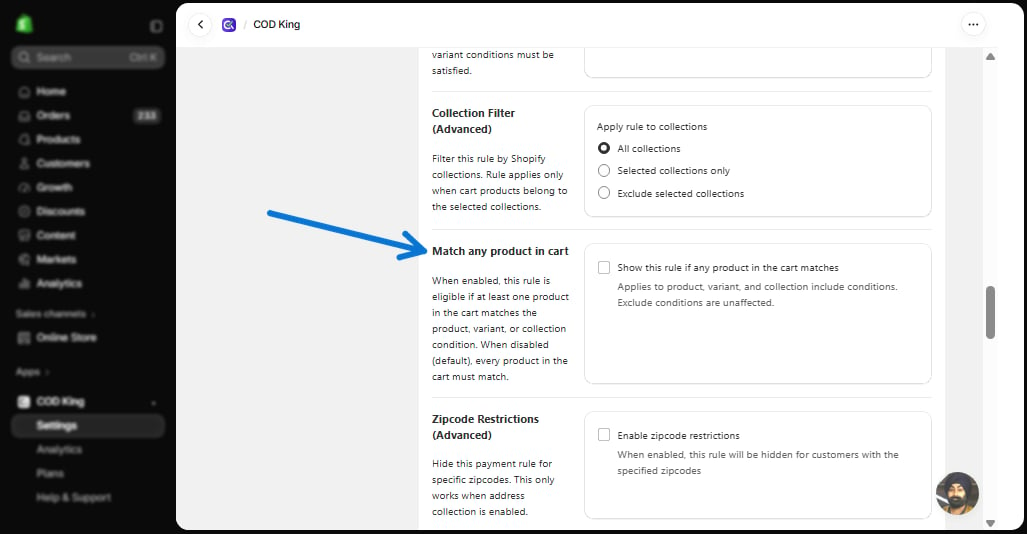
- Left unchecked, every product in the cart has to satisfy your filters, or the rule stays hidden.
- Checked; just one qualifying product is enough to show the rule for the whole cart.
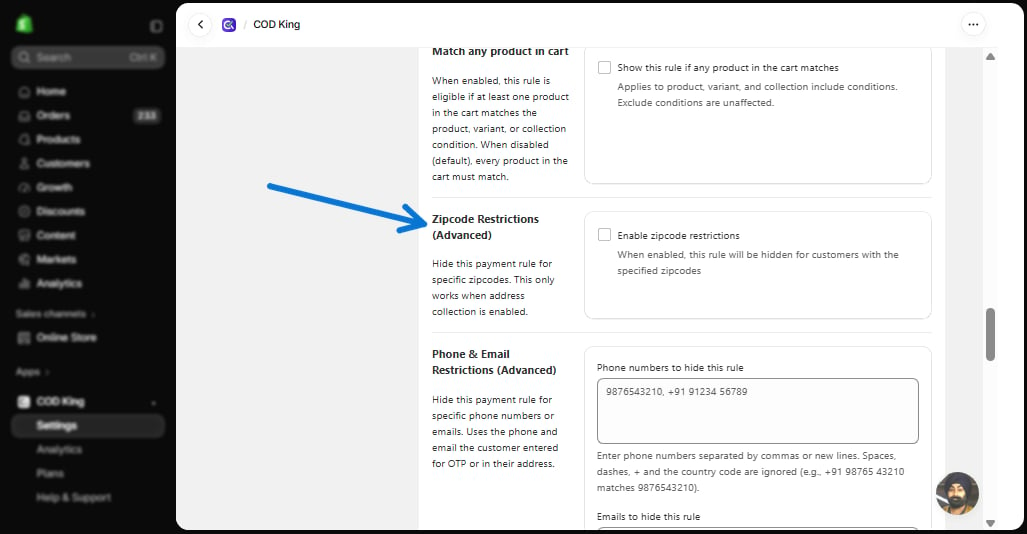
- Zipcode Restrictions hides the option in the zip codes you list.
- Zipcode Includes does the opposite—the option only shows in the zip codes you list.
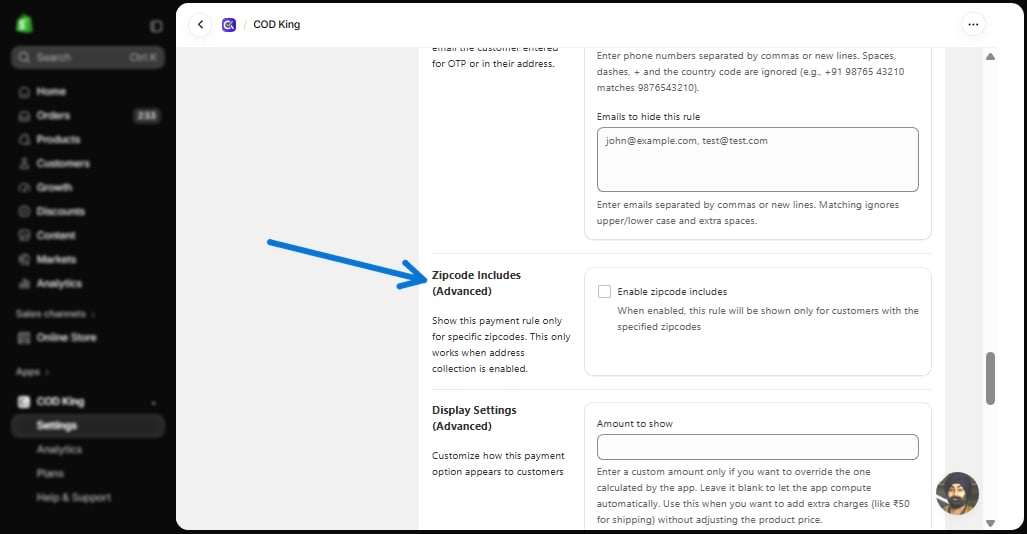
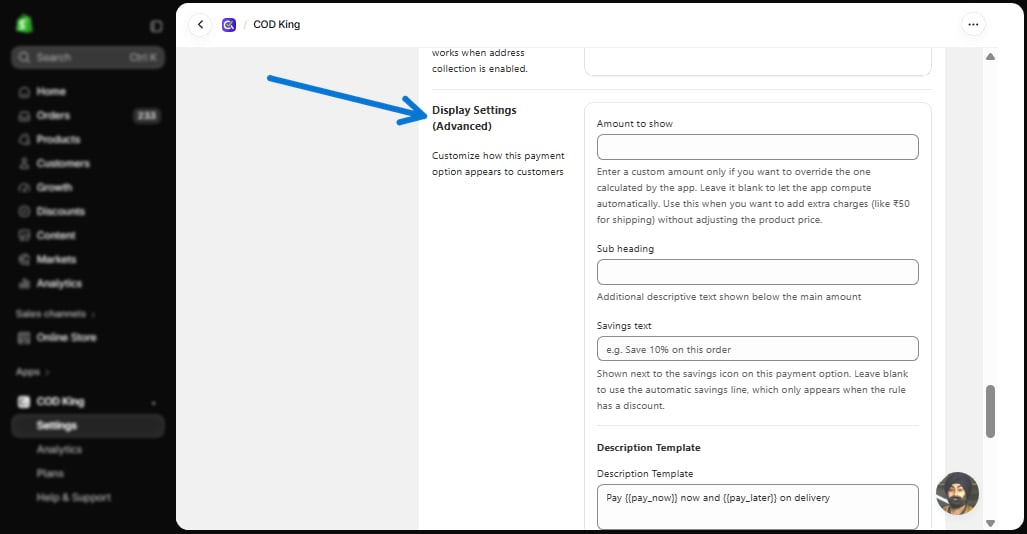
Step 6: Tune the Advanced Settings
With your rules in place, these settings let you fine-tune how partial payment behaves across the whole store. On the Partial payments & COD page, open the Advanced Settings tab next to Payment Rules. 6a. Tax & Calculations Decide whether the deposit includes tax or not. If you leave tax for later, use the Partial Tax Text field to explain that—something like “Taxes due on delivery” works well.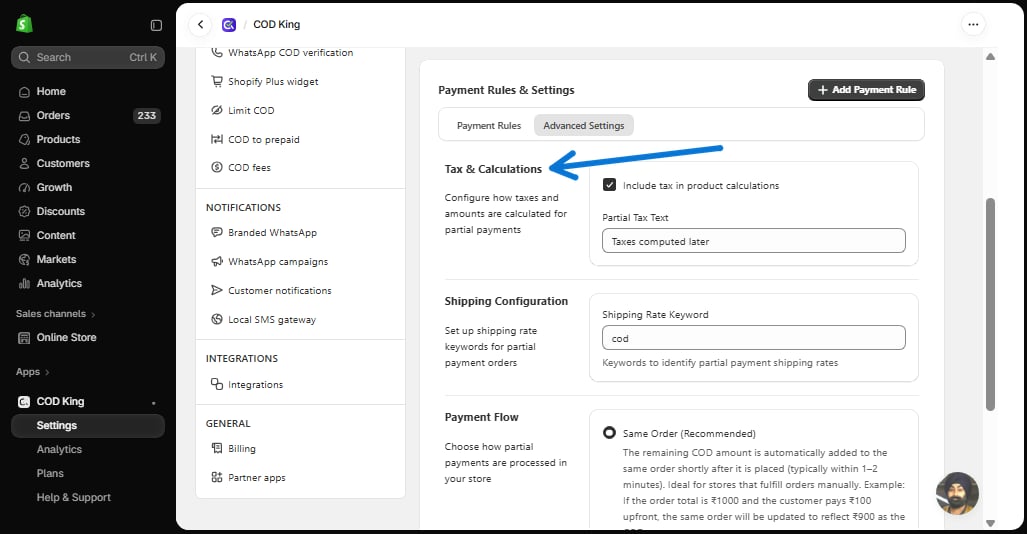
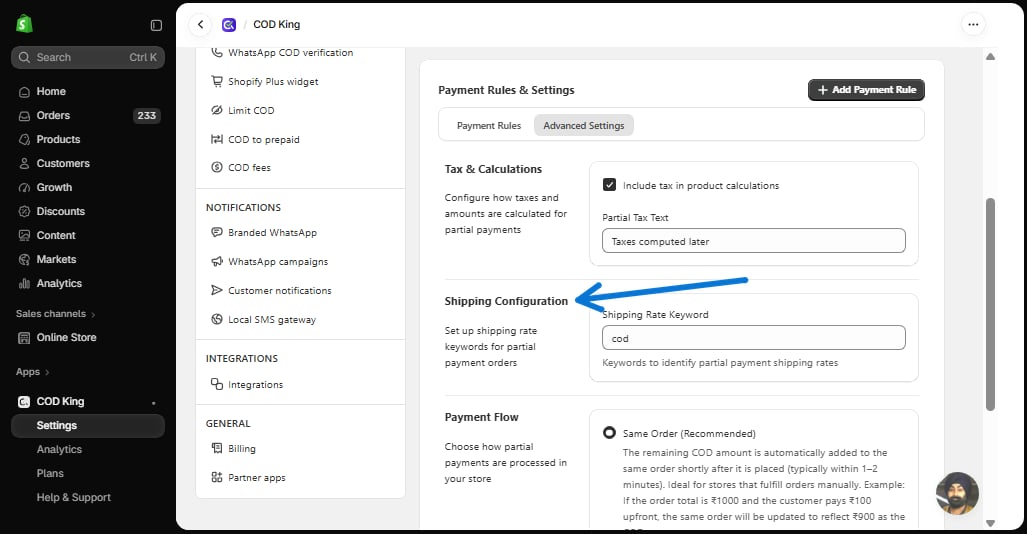
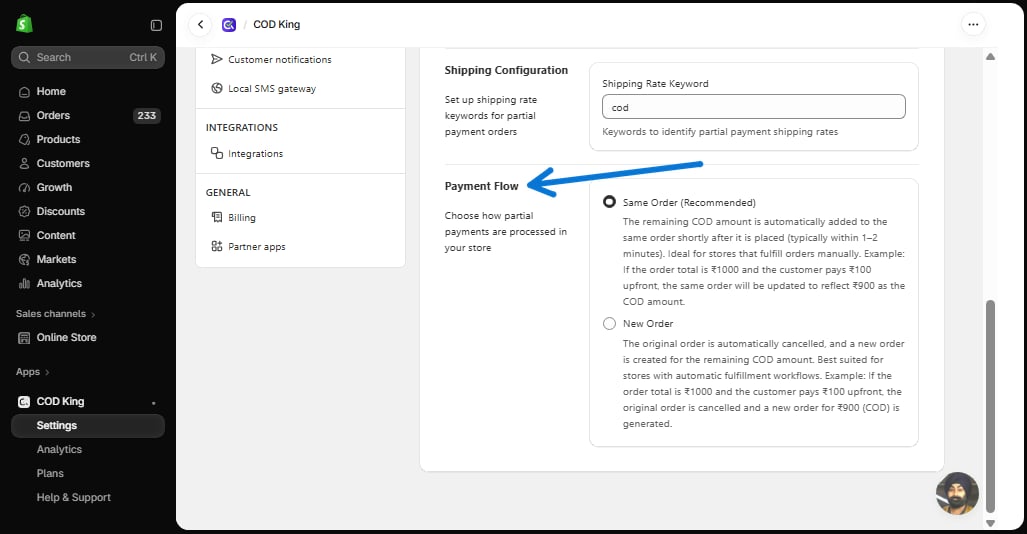
- Same Order (recommended) simply updates the original order with the balance due—a good fit if you’re fulfilling manually.
- New Order cancels the original and opens a fresh order for the remaining amount, which suits automated or 3PL fulfillment better.
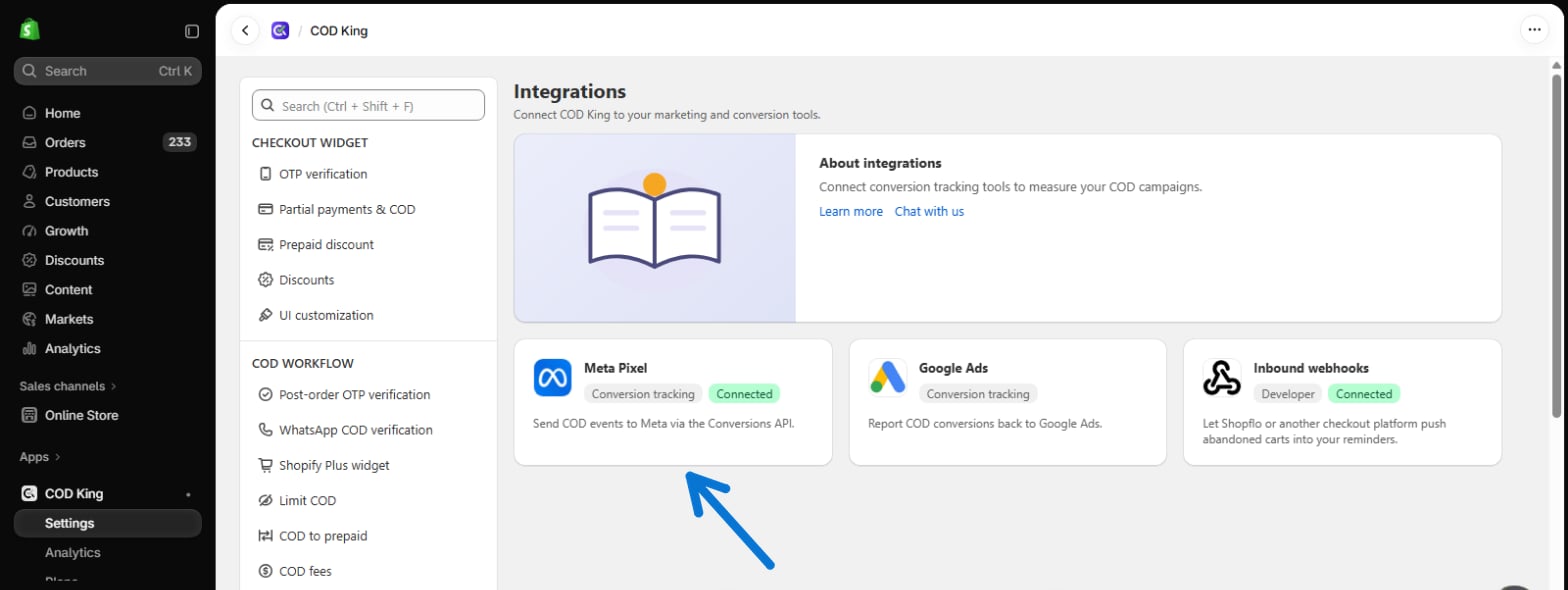
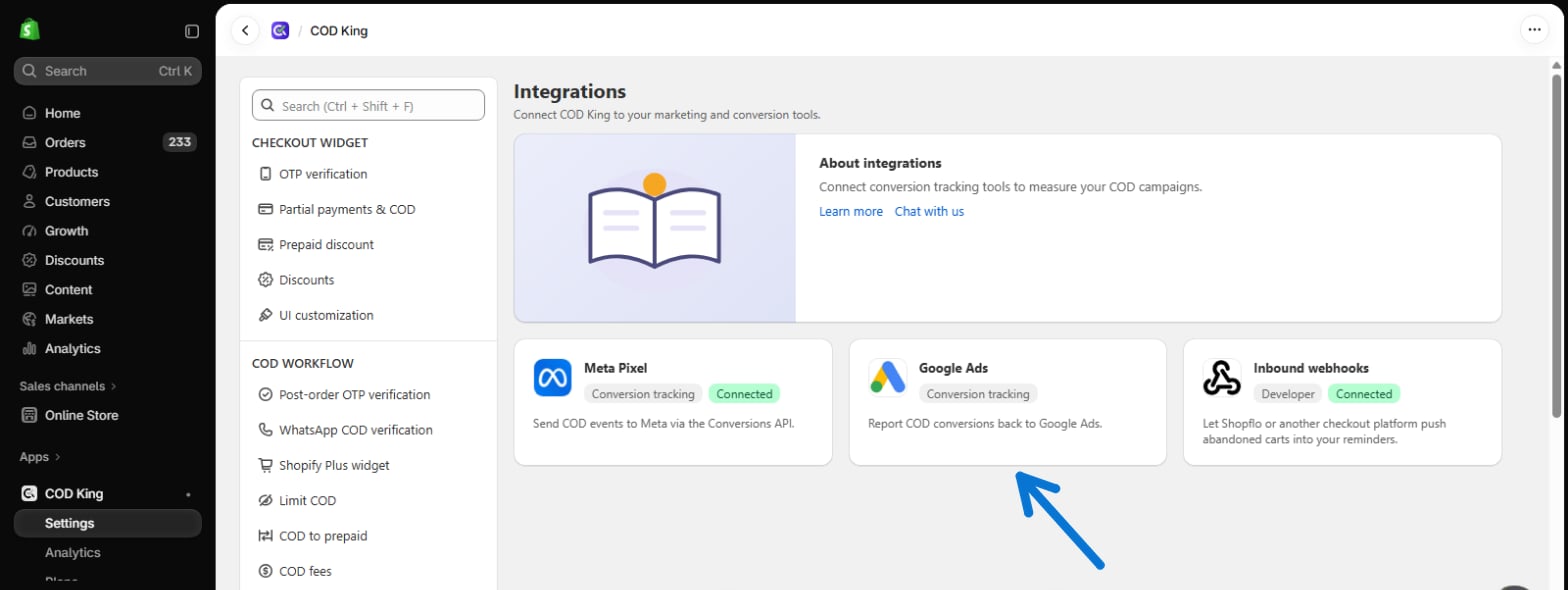
Step 7: Style the Checkout Pop-Up
Last stretch—this is where you make the pop-up feel like part of your store rather than a bolted-on plugin. Go to Settings → UI customization and click Customize. 7a. Branding Under Logo and colours, add your brand logo URL and store name so the pop-up is unmistakably yours. 7 b. Buttons & Fallback Messages Under Payment screen, rename the main button to whatever fits your tone—“Pay Deposit Now” is a common one. And write a fallback message (No option fits this cart) for carts that don’t qualify for any rule, so customers aren’t left staring at a blank state. 7 c. Promotional Banners If you want to run a promo inside the pop-up itself, go back to Logo and colours, turn on Show Promo Banner, write your message (“Get 50% OFF on Your 2nd Order,” say), and set the background and text colors to match your brand.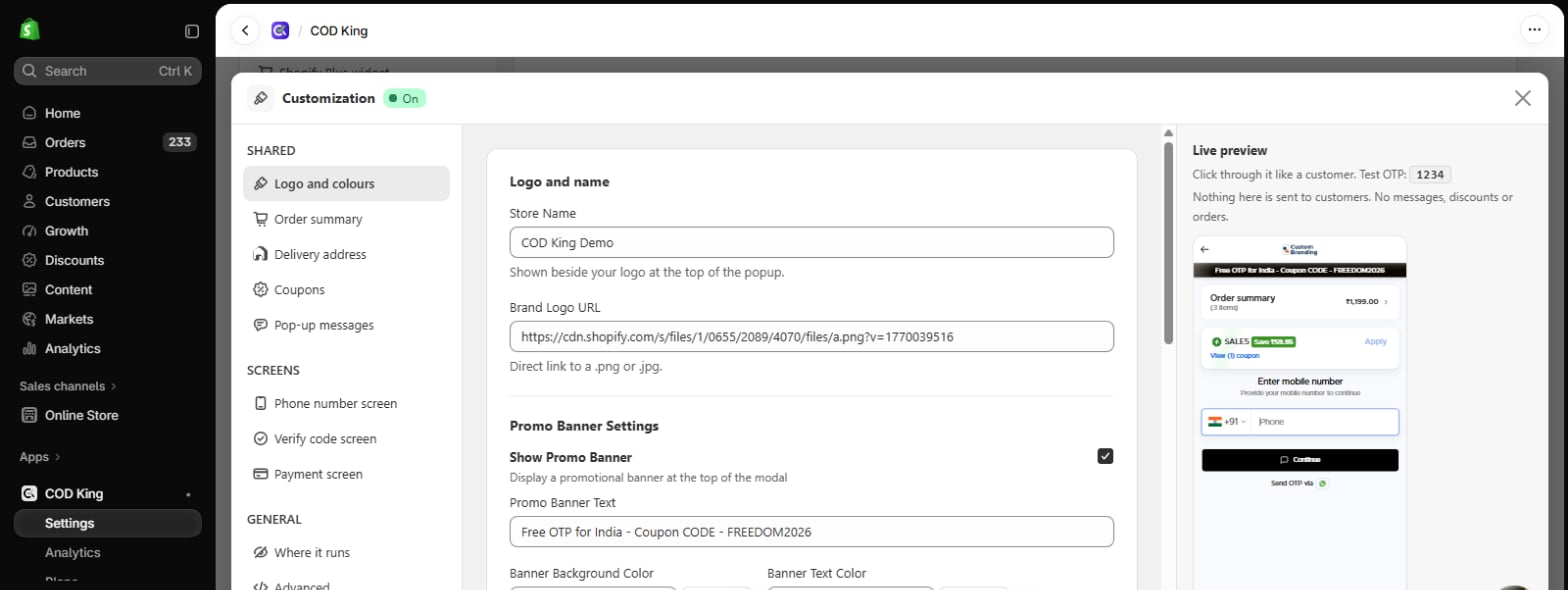
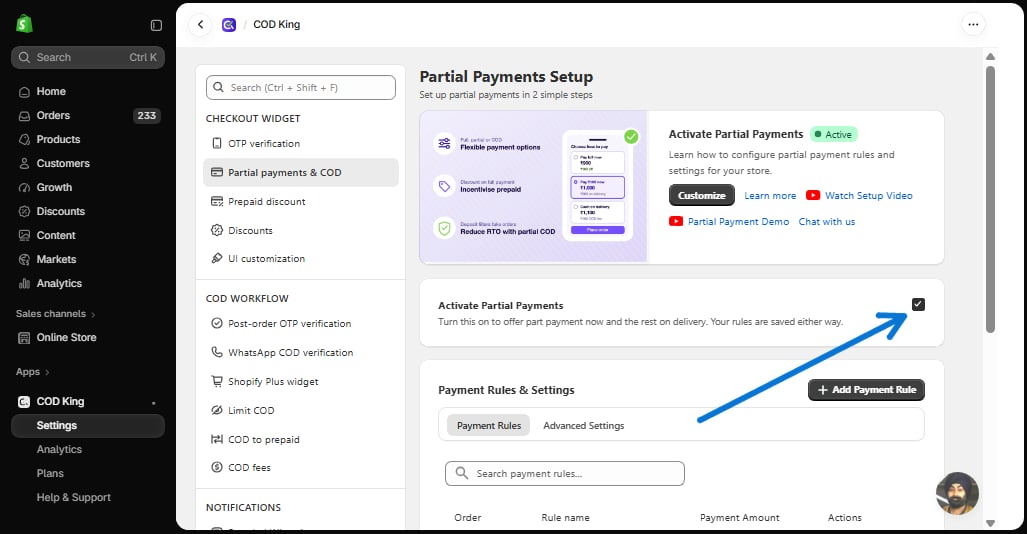
Step 8: Turn It On
Go back to Settings → Partial payments & COD, scroll to the top of the page and check the Activate Partial Payments box. Go to Settings →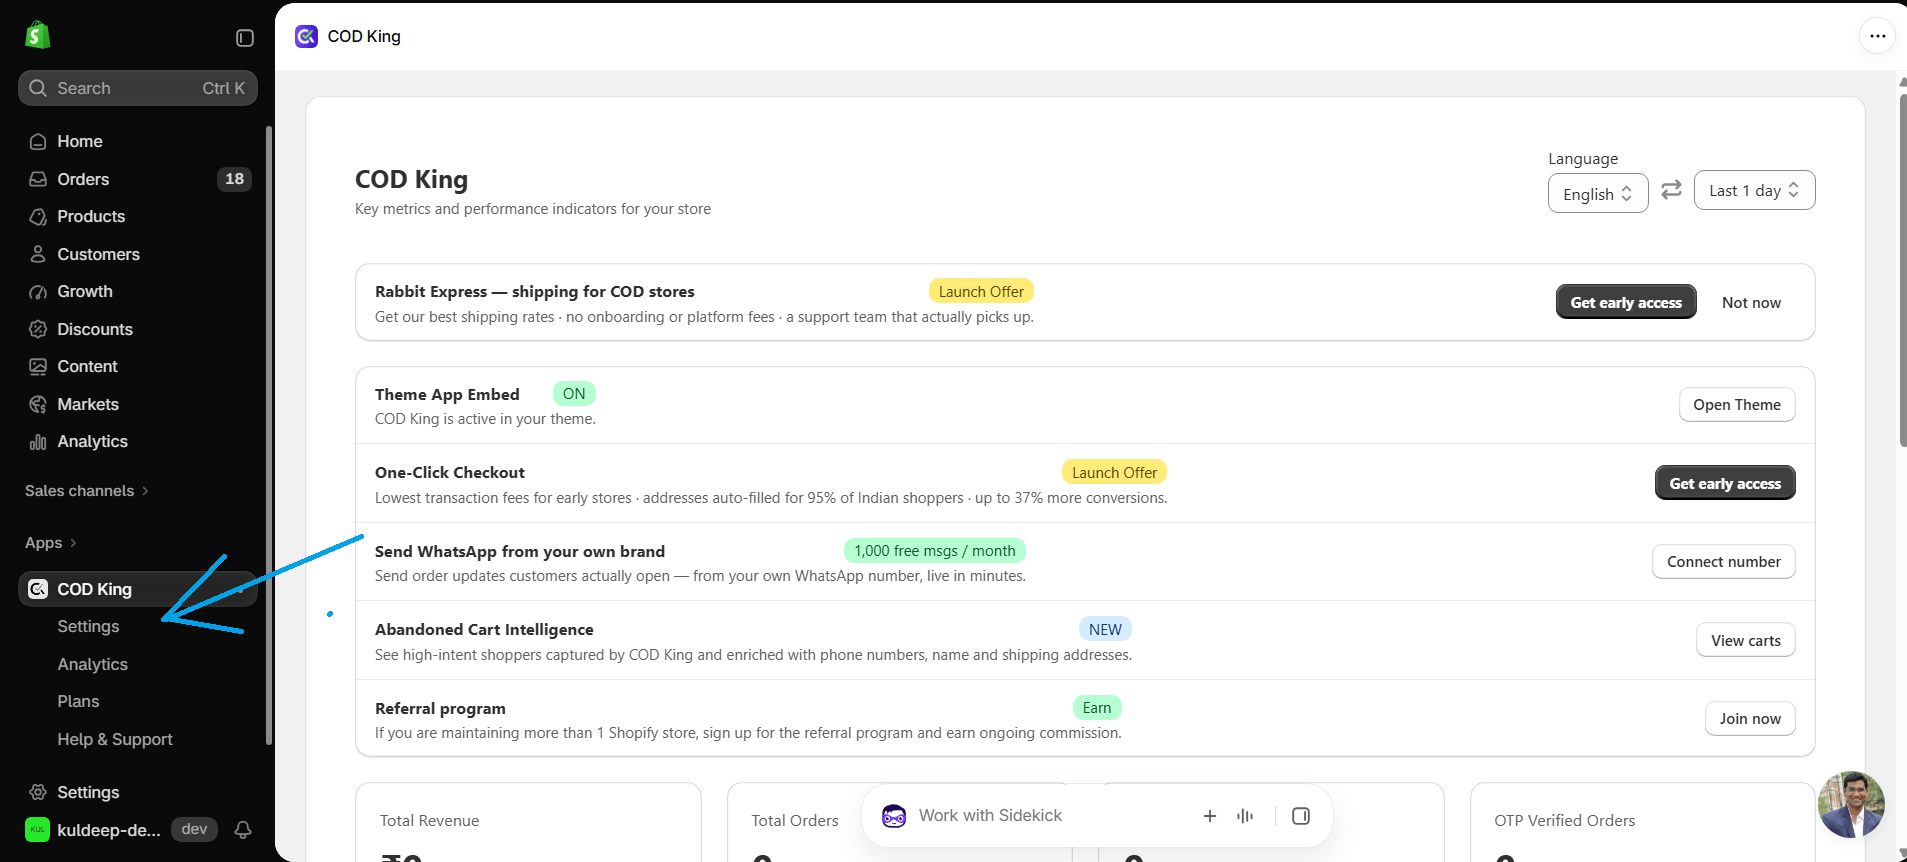
Step 9: Check Your Work
Head to checkout and confirm the partial payment option actually shows up the way you configured it.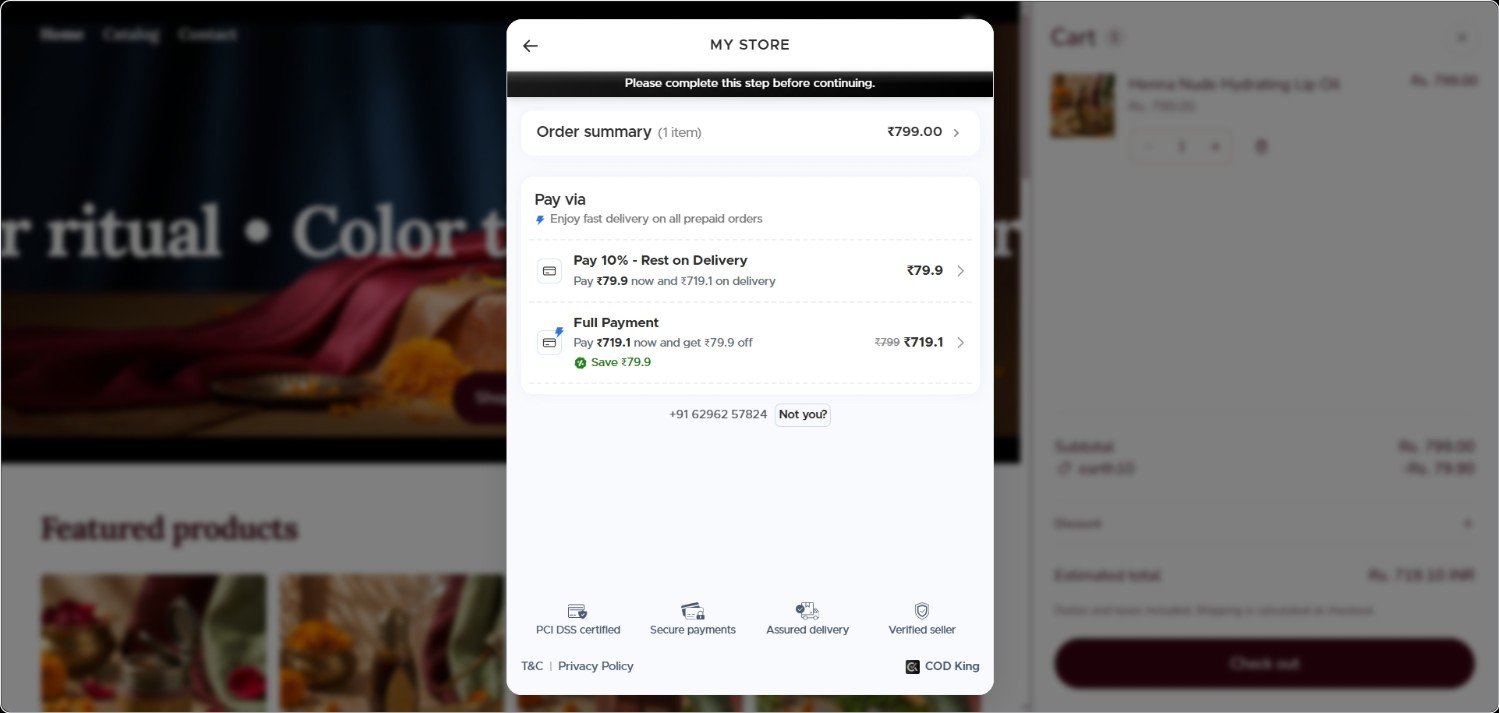
Need Help?
Contact our support team for setup assistance or customized payment flow rules.
Integrations
Learn how to sync Partial COD with your ERP, 3PL fulfillment, and custom gateways.