
Open the editor
1
Go to Settings → UI customization
It is under Checkout widget in the COD King left menu.
2
Click Customize
A full-screen editor opens. The tabs across the top are Logo and colours, Order summary, Delivery address, Coupons, Pop-up messages, Phone number screen, Verify code screen, Payment screen, Where it runs and Advanced.
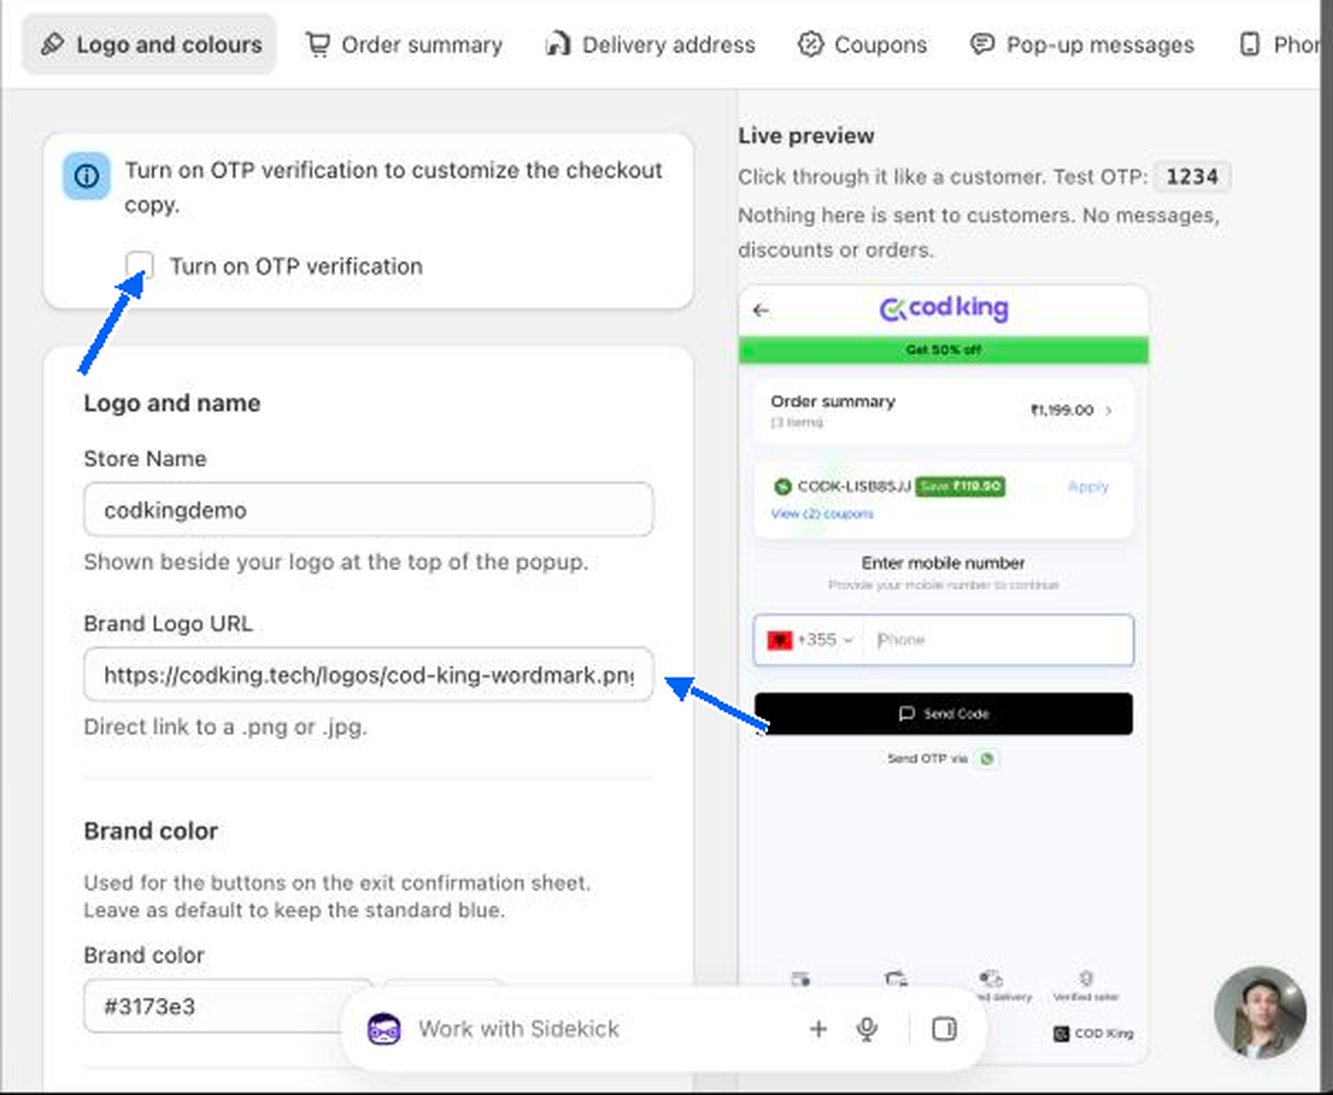
Text boxes become editable once OTP verification is on. While it is off, the editor shows a Turn on OTP verification to customize the checkout copy box with a checkbox, and the defaults are greyed out. A blank box keeps the default wording, and
{{curly braces}} fill in automatically.The live preview
The right-hand Live preview shows what a shopper sees and updates as you type. It is a sandbox: nothing is sent to customers and no orders or discounts are created. Click through it like a customer and use the test code1234.
Logo and colours
Phone number screen
The first screen, where the shopper types their number.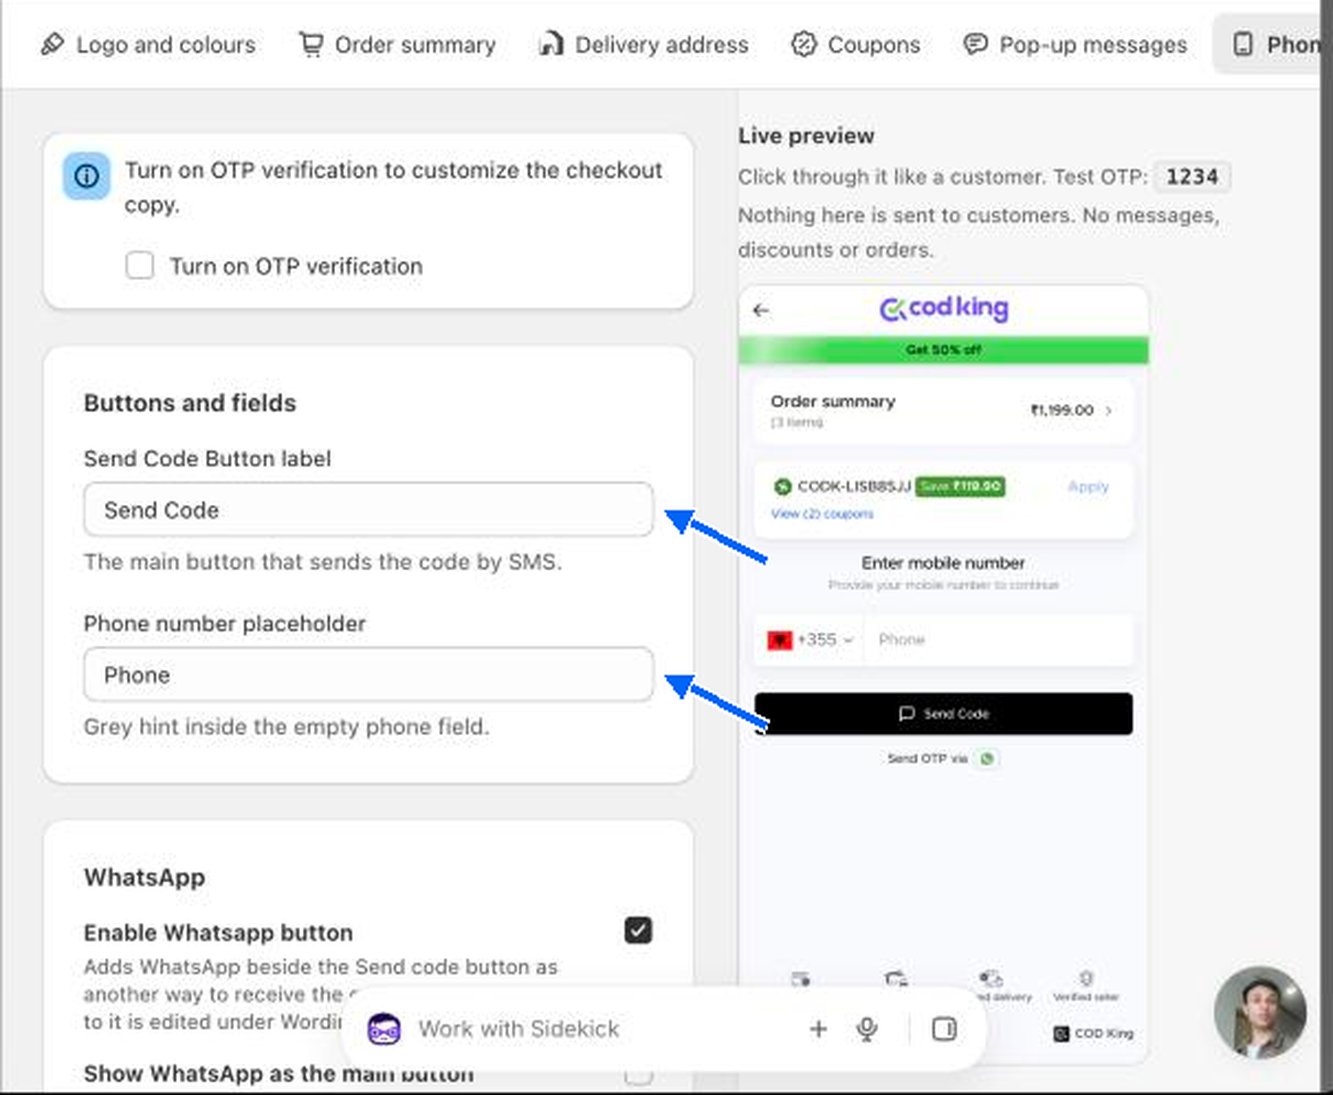
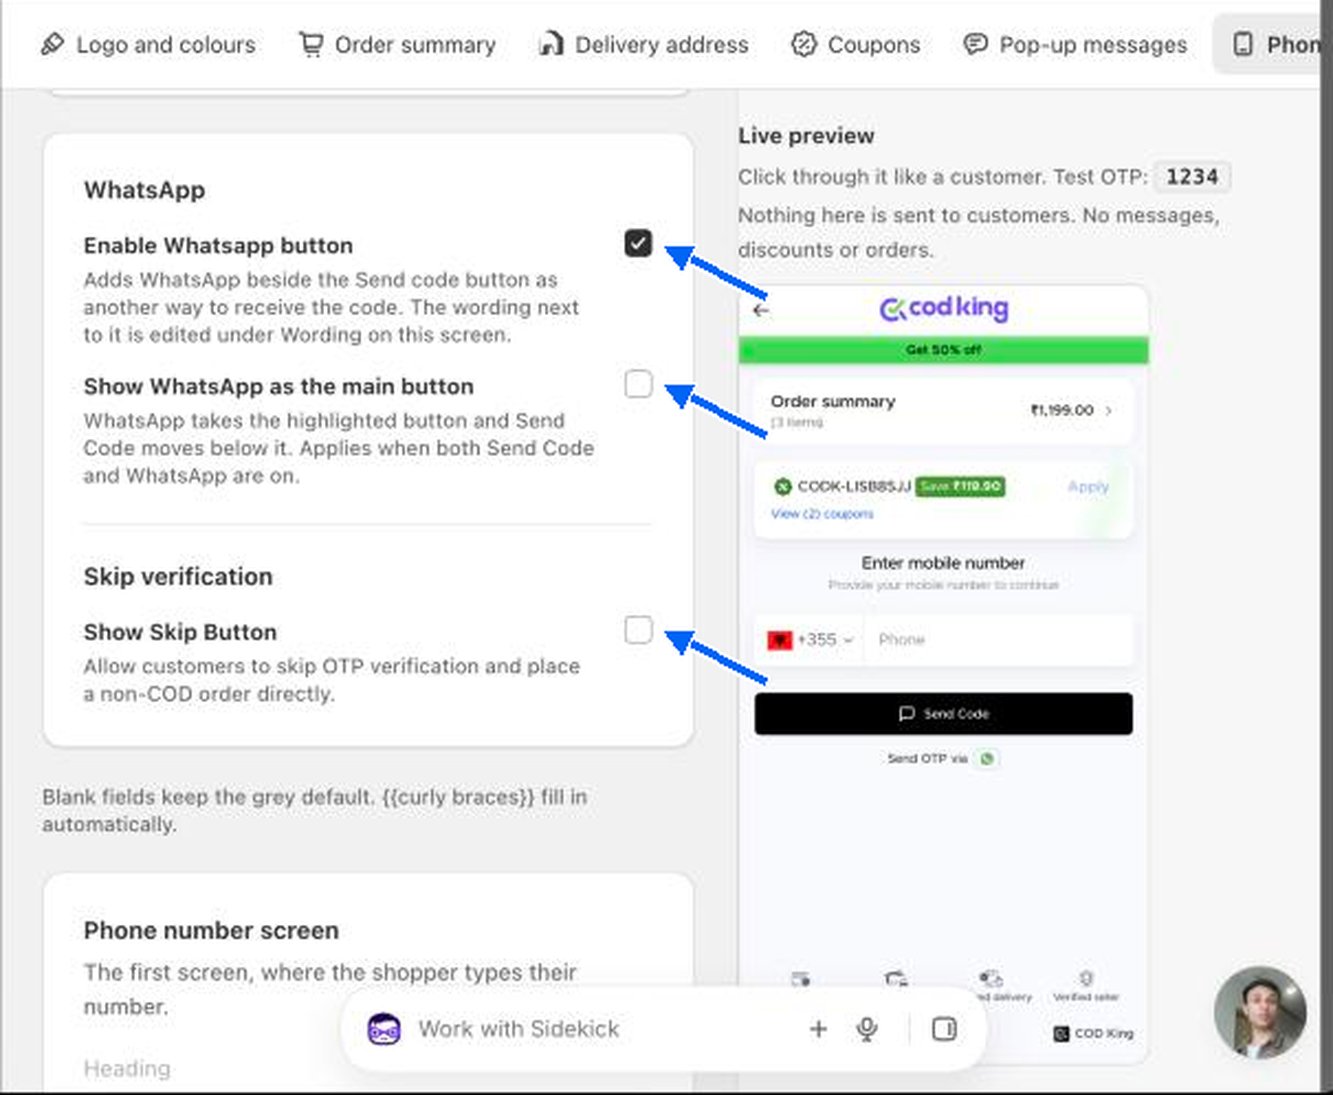
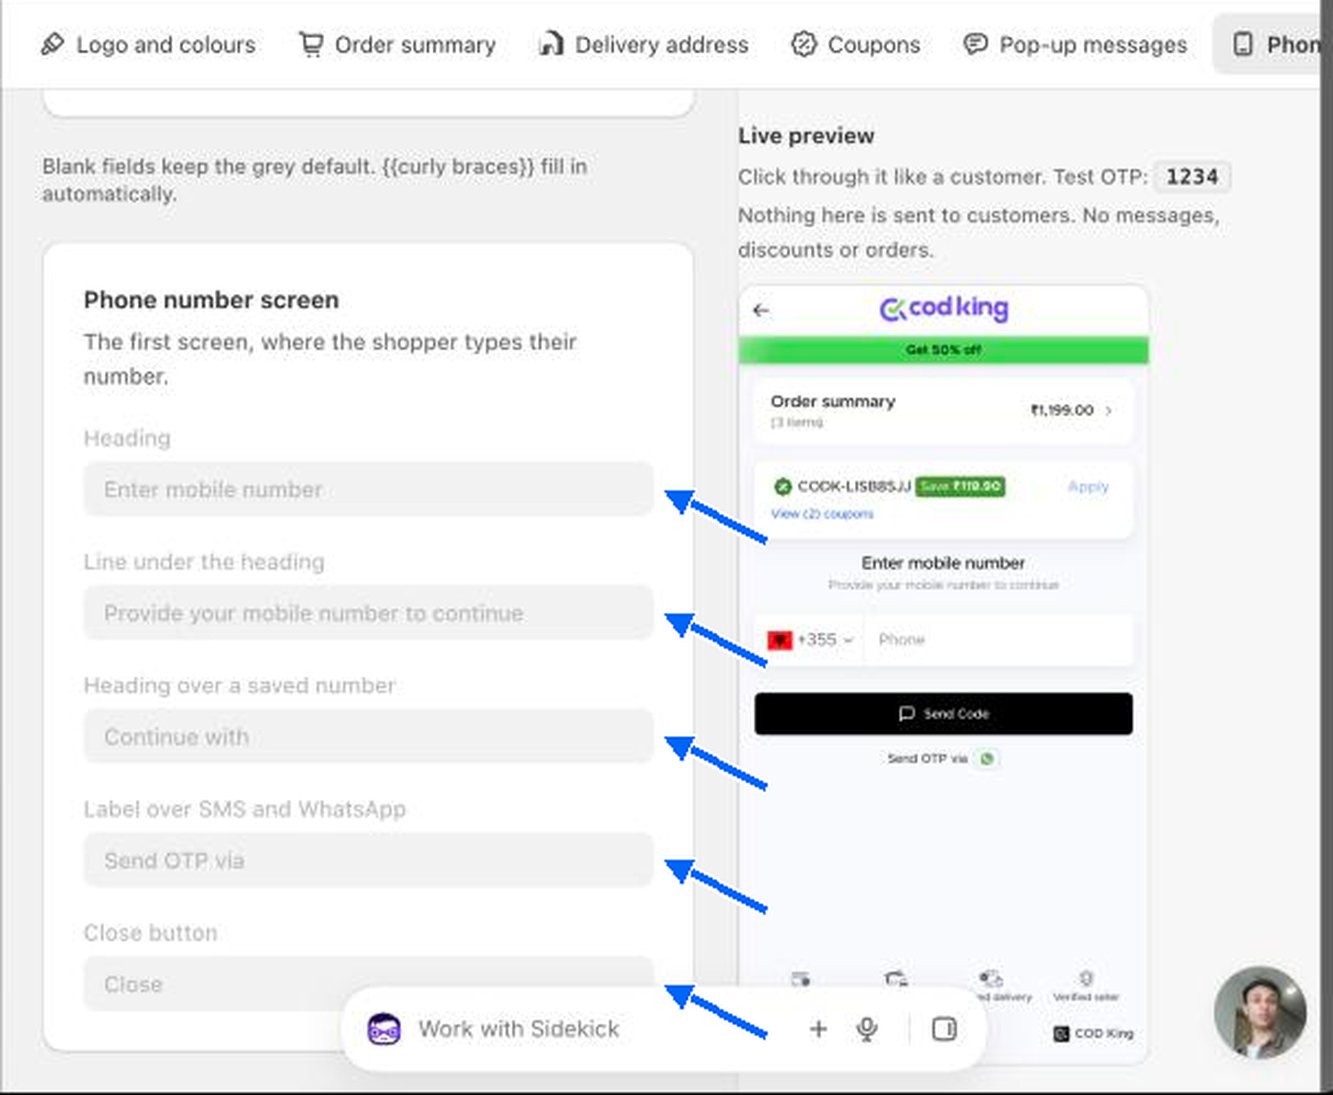
- Heading (default Enter mobile number) and Line under the heading (default Provide your mobile number to continue).
- Heading over a saved number (default Continue with), shown when the shopper has a saved number.
- Label over SMS and WhatsApp (default Send OTP via).
- Close button (default Close).
Verify code screen
Where the shopper types the code you sent.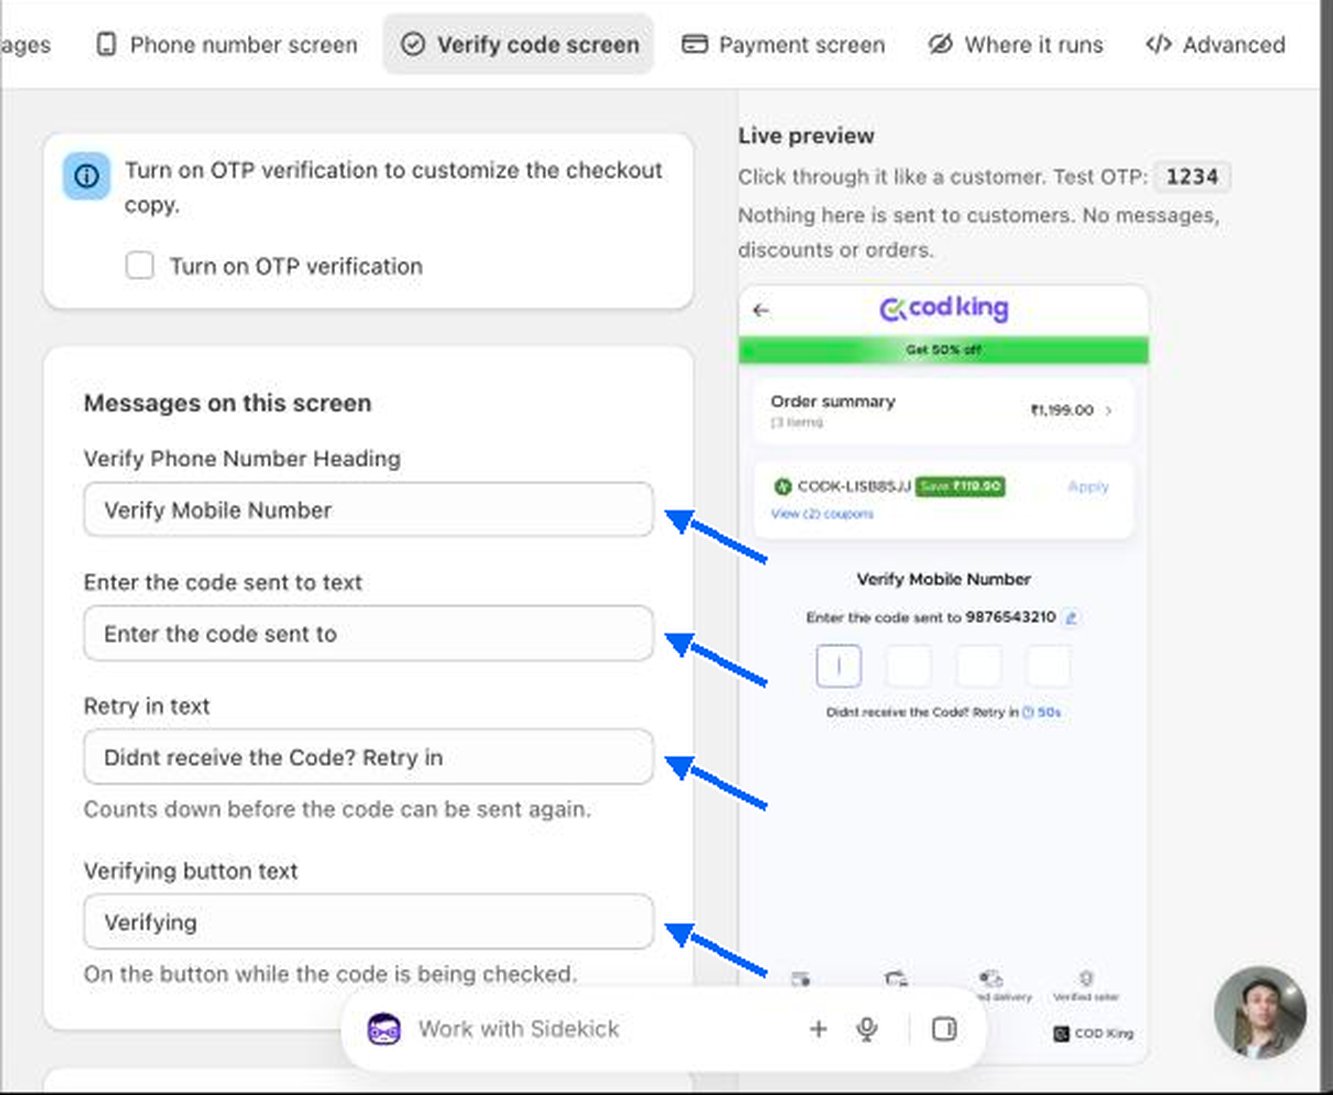
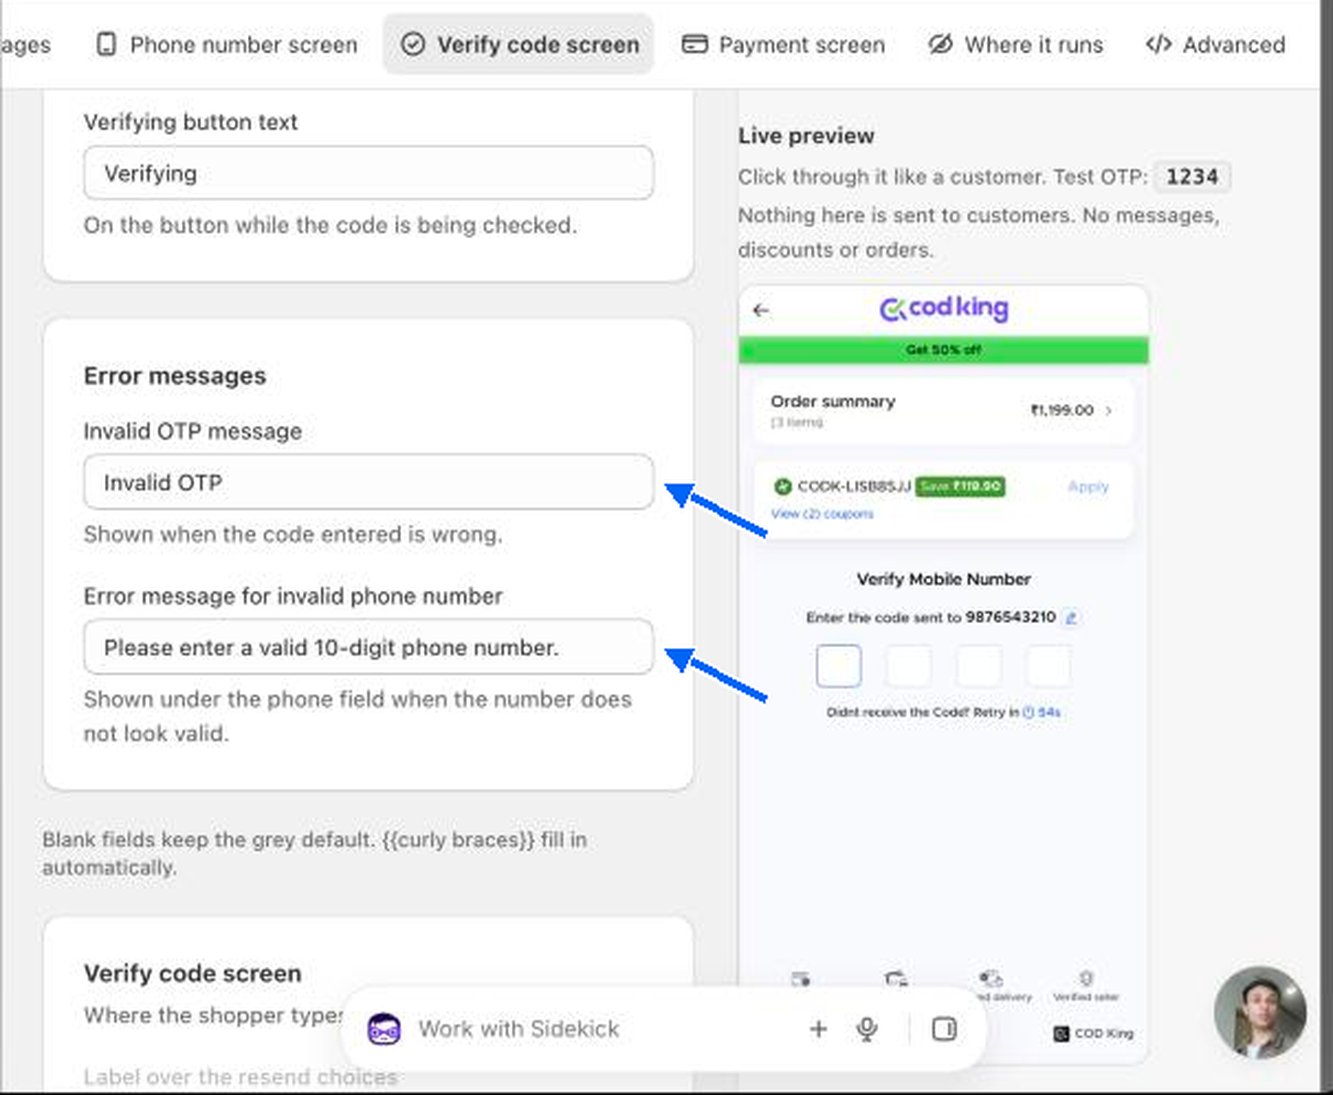
- Invalid OTP message (default Invalid OTP) is shown when the code entered is wrong.
- Error message for invalid phone number (default Please enter a valid 10-digit phone number.) is shown under the phone field when the number does not look valid.
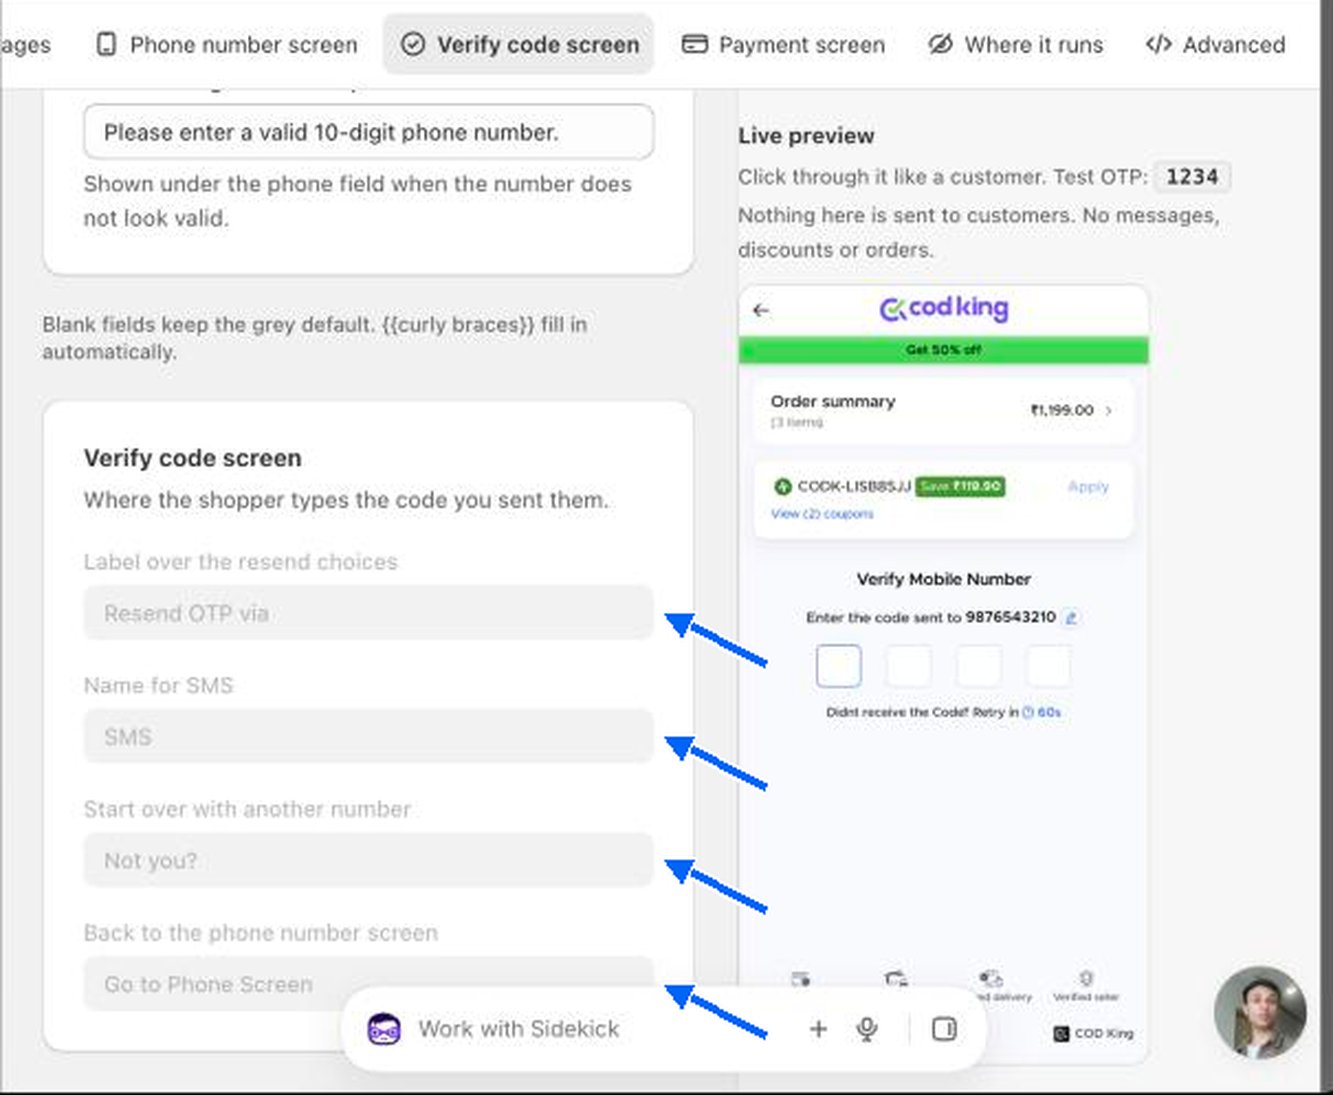
- Label over the resend choices (default Resend OTP via).
- Name for SMS (default SMS).
- Start over with another number (default Not you?).
- Back to the phone number screen (default Go to Phone Screen).
Where it runs
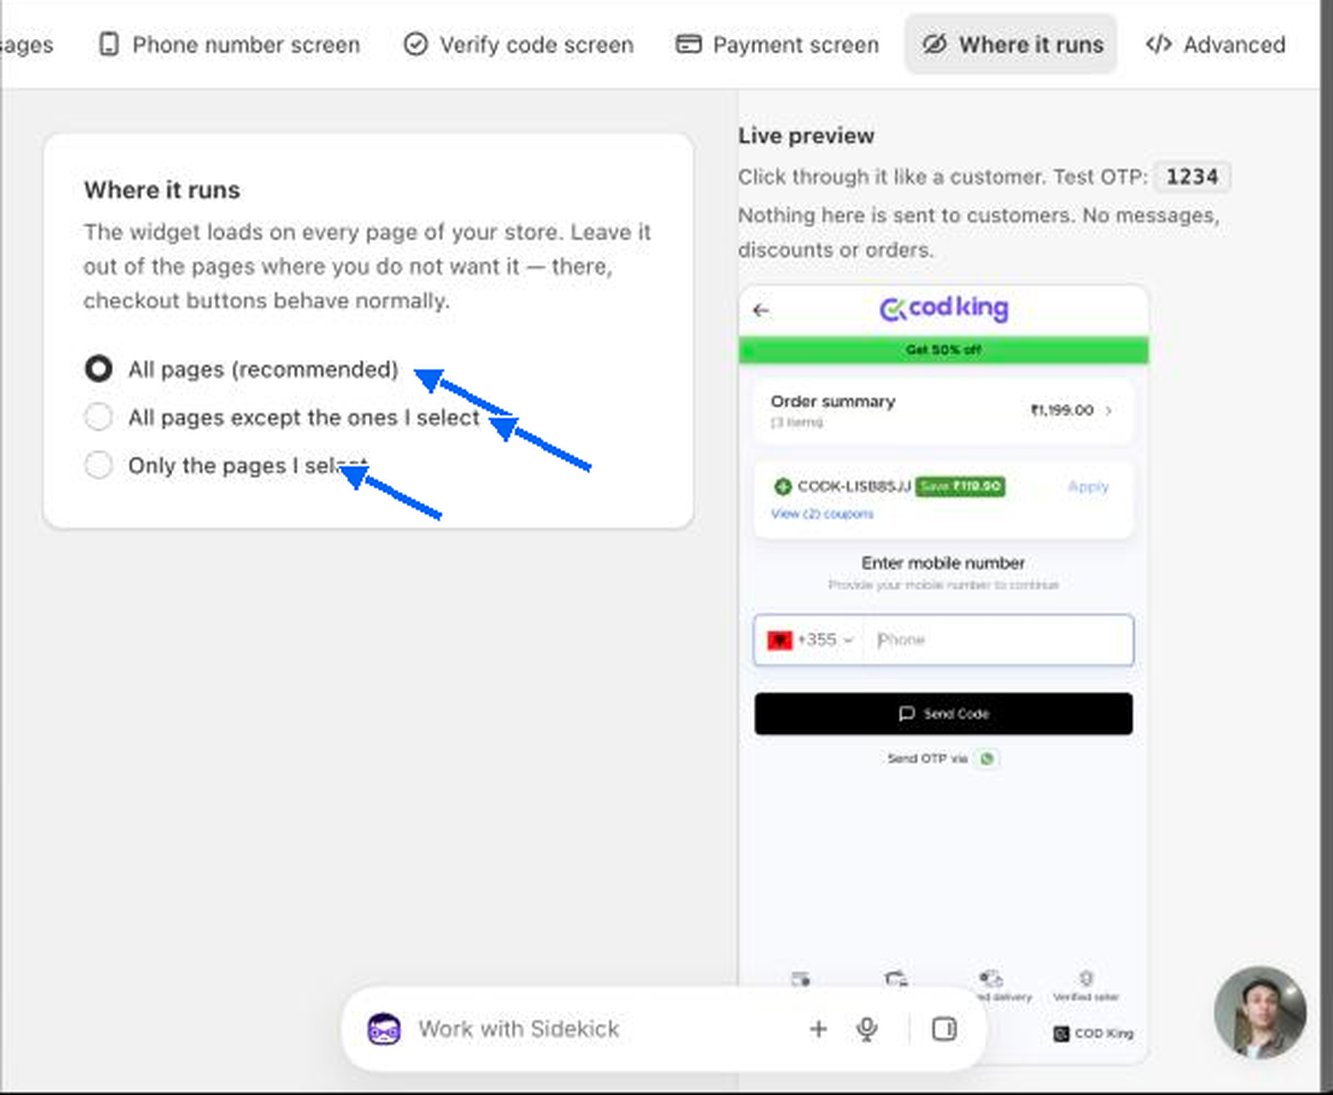
- All pages (recommended).
- All pages except the ones I select.
- Only the pages I select.
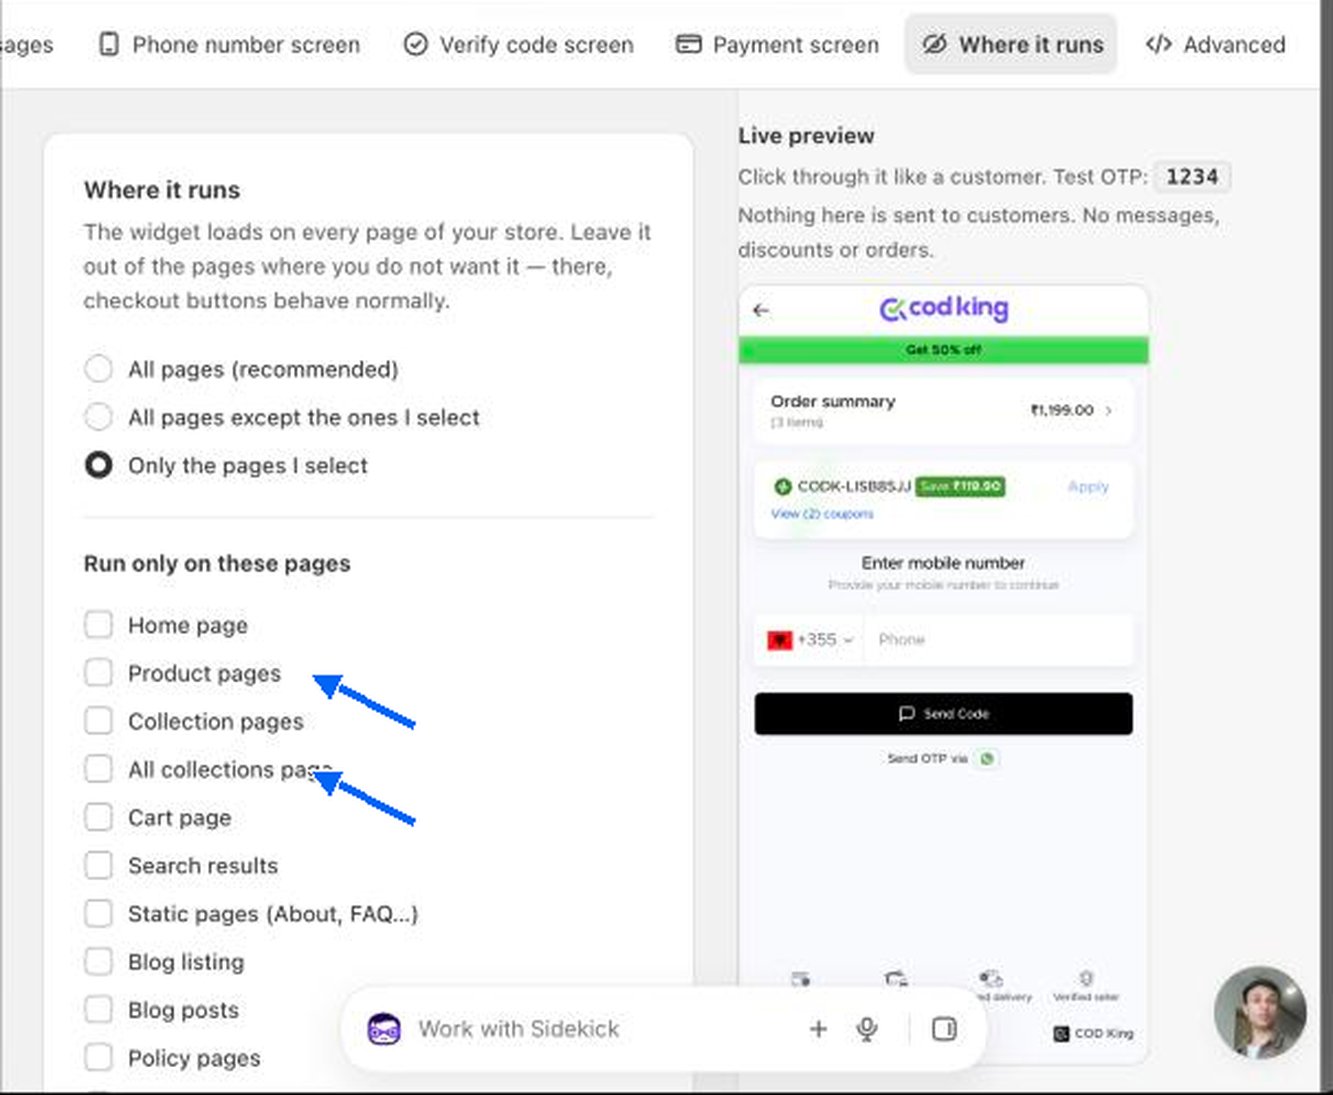
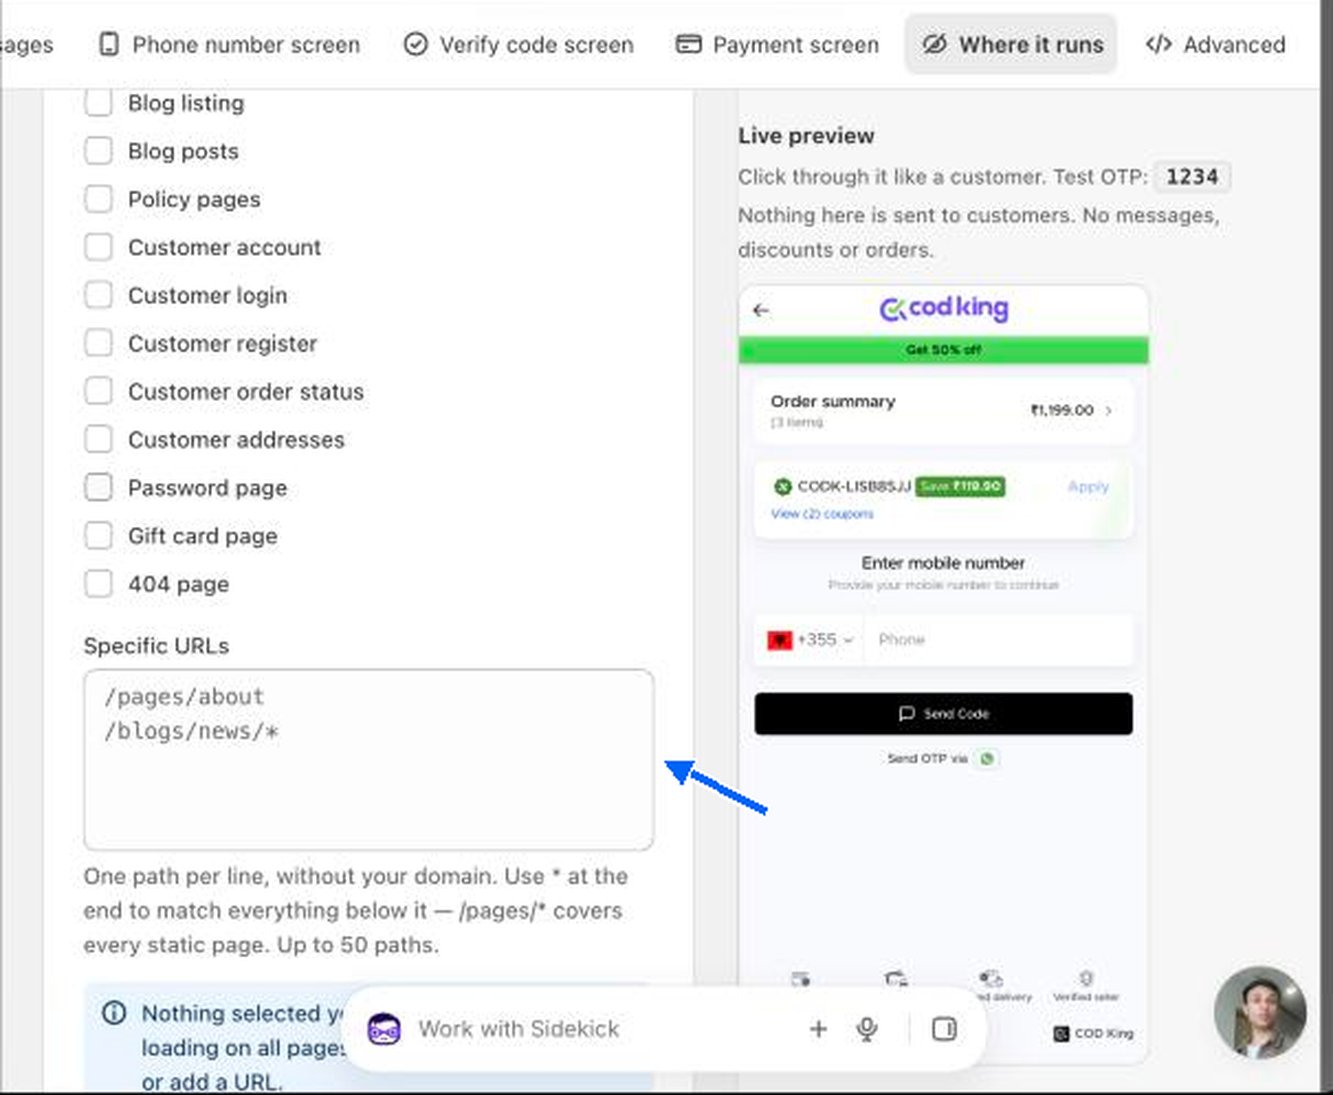
/pages/about. Use * at the end to match everything below it, so /pages/* covers every static page. You can add up to 50 paths. If nothing is selected, the widget keeps loading on all pages.
Advanced
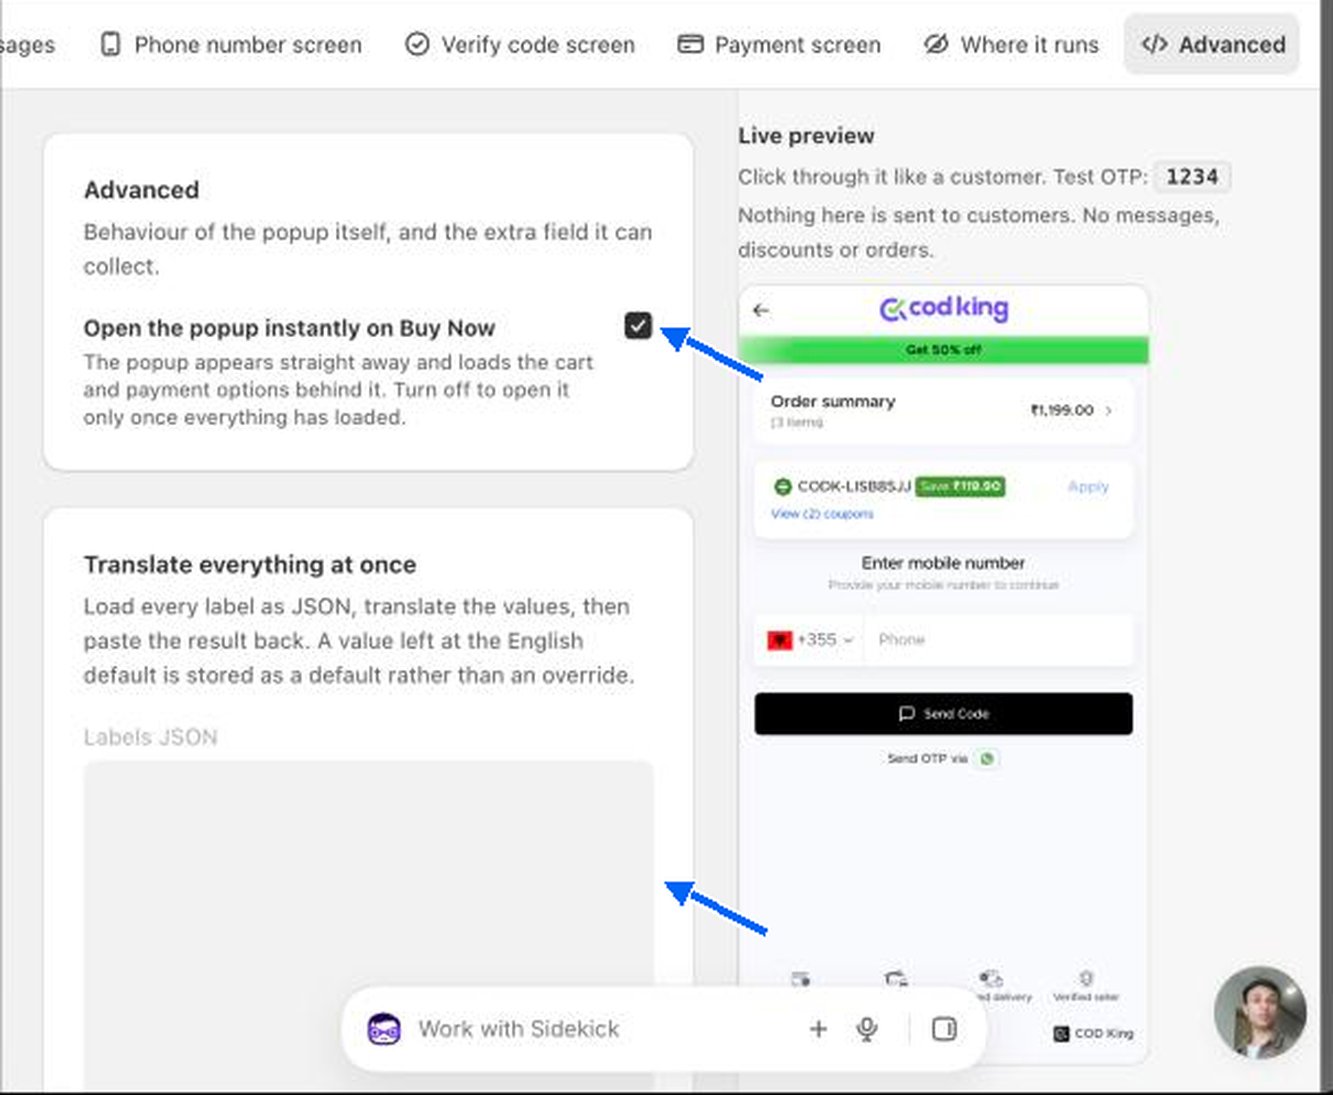
- Open the popup instantly on Buy Now. The popup appears straight away and loads the cart and payment options behind it. Turn it off to open the popup only once everything has loaded.
- Translate everything at once. Click Load current text to get every label as JSON, translate the values, then paste the result back and apply it. A value left at the English default is stored as a default rather than an override.